Algolia
How to setup Algolia DocSearch
Updated:
I recently set up Algolia DocSearch for this site and wanted to share how I did it. DocSearch is free if your project is open-source. You can apply here.
While waiting for my application to be approved, I discovered that you could set up DocSearch manually using a docker image they provide. Eventually, I managed to get everything working but found their documentation lacking and confusing.
In this post, I will show you exactly how I got DocSearch working and how I created a GitHub action to automatically run and crawl my site.
Creating an Algolia account
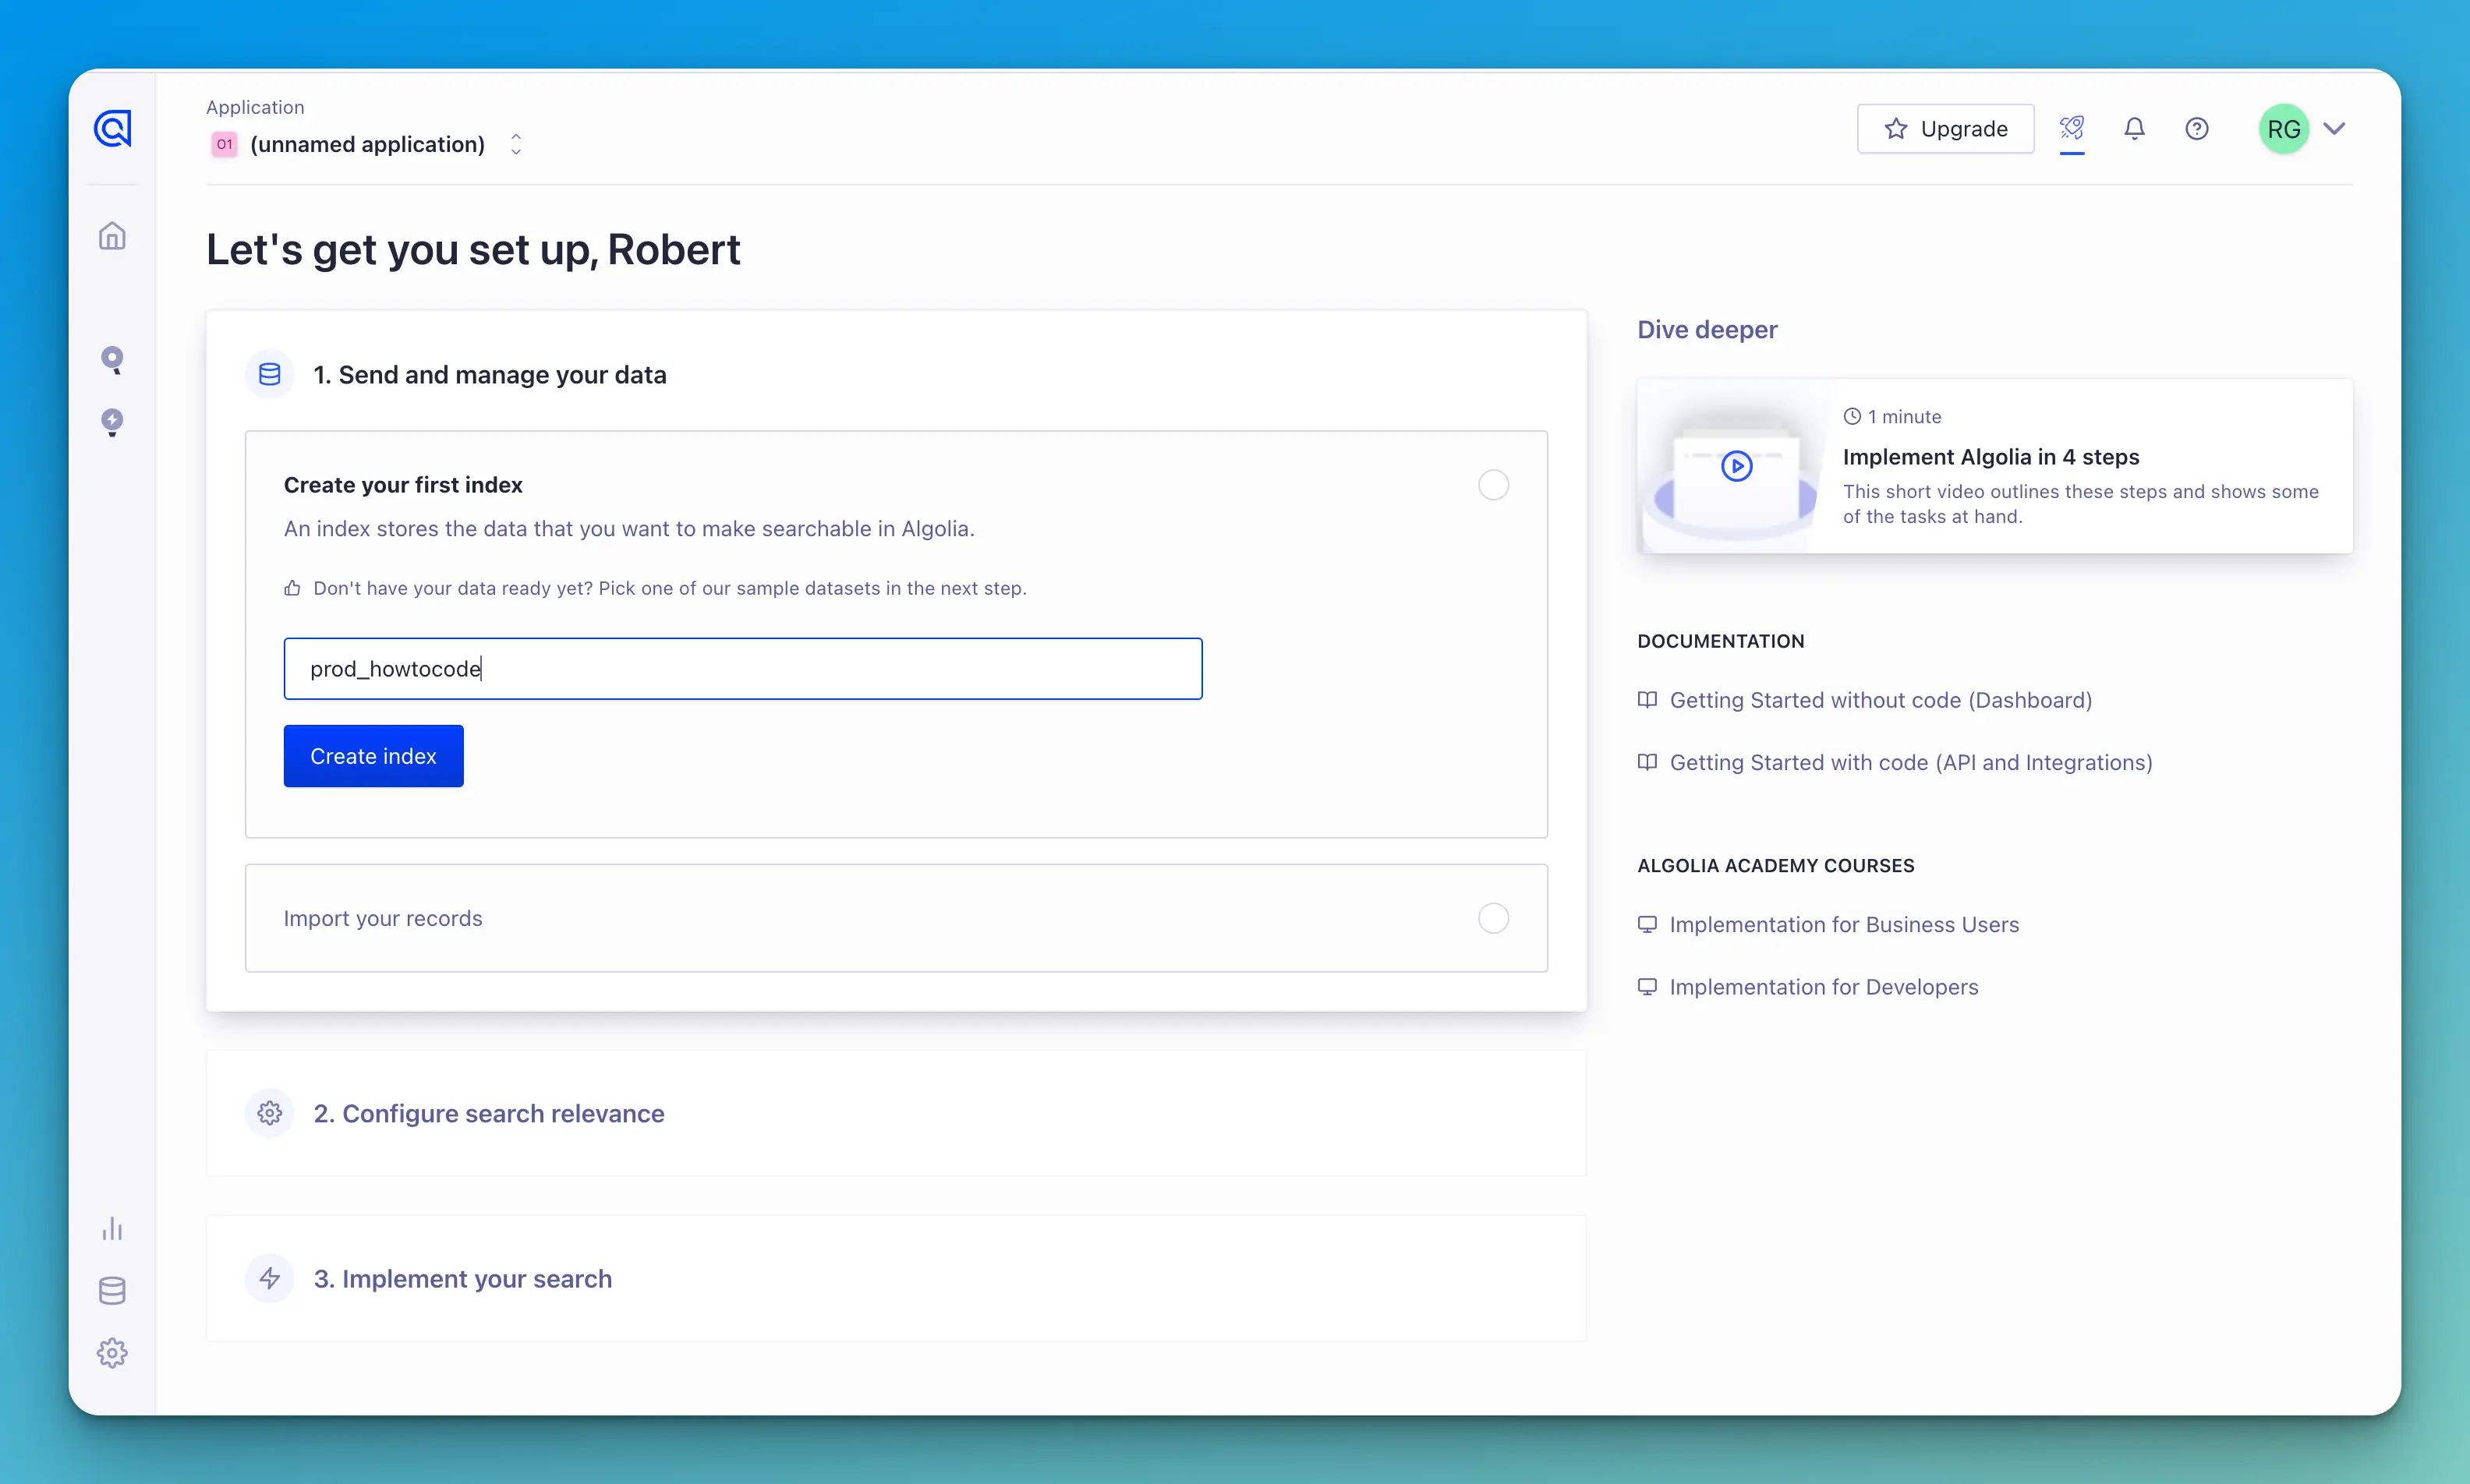
The first thing you will need is an Algolia account. It is straightforward to create using either a Google account or your GitHub account.
After creating your account, you will need to make your first index. I chose to name mine prod_howtocode
Larger screenshots
You can click on the screenshots to see larger versions.
Next, you need to import your records, but this is what we are setting up DocSearch to do. Once you have created your index, you are all set.
API keys
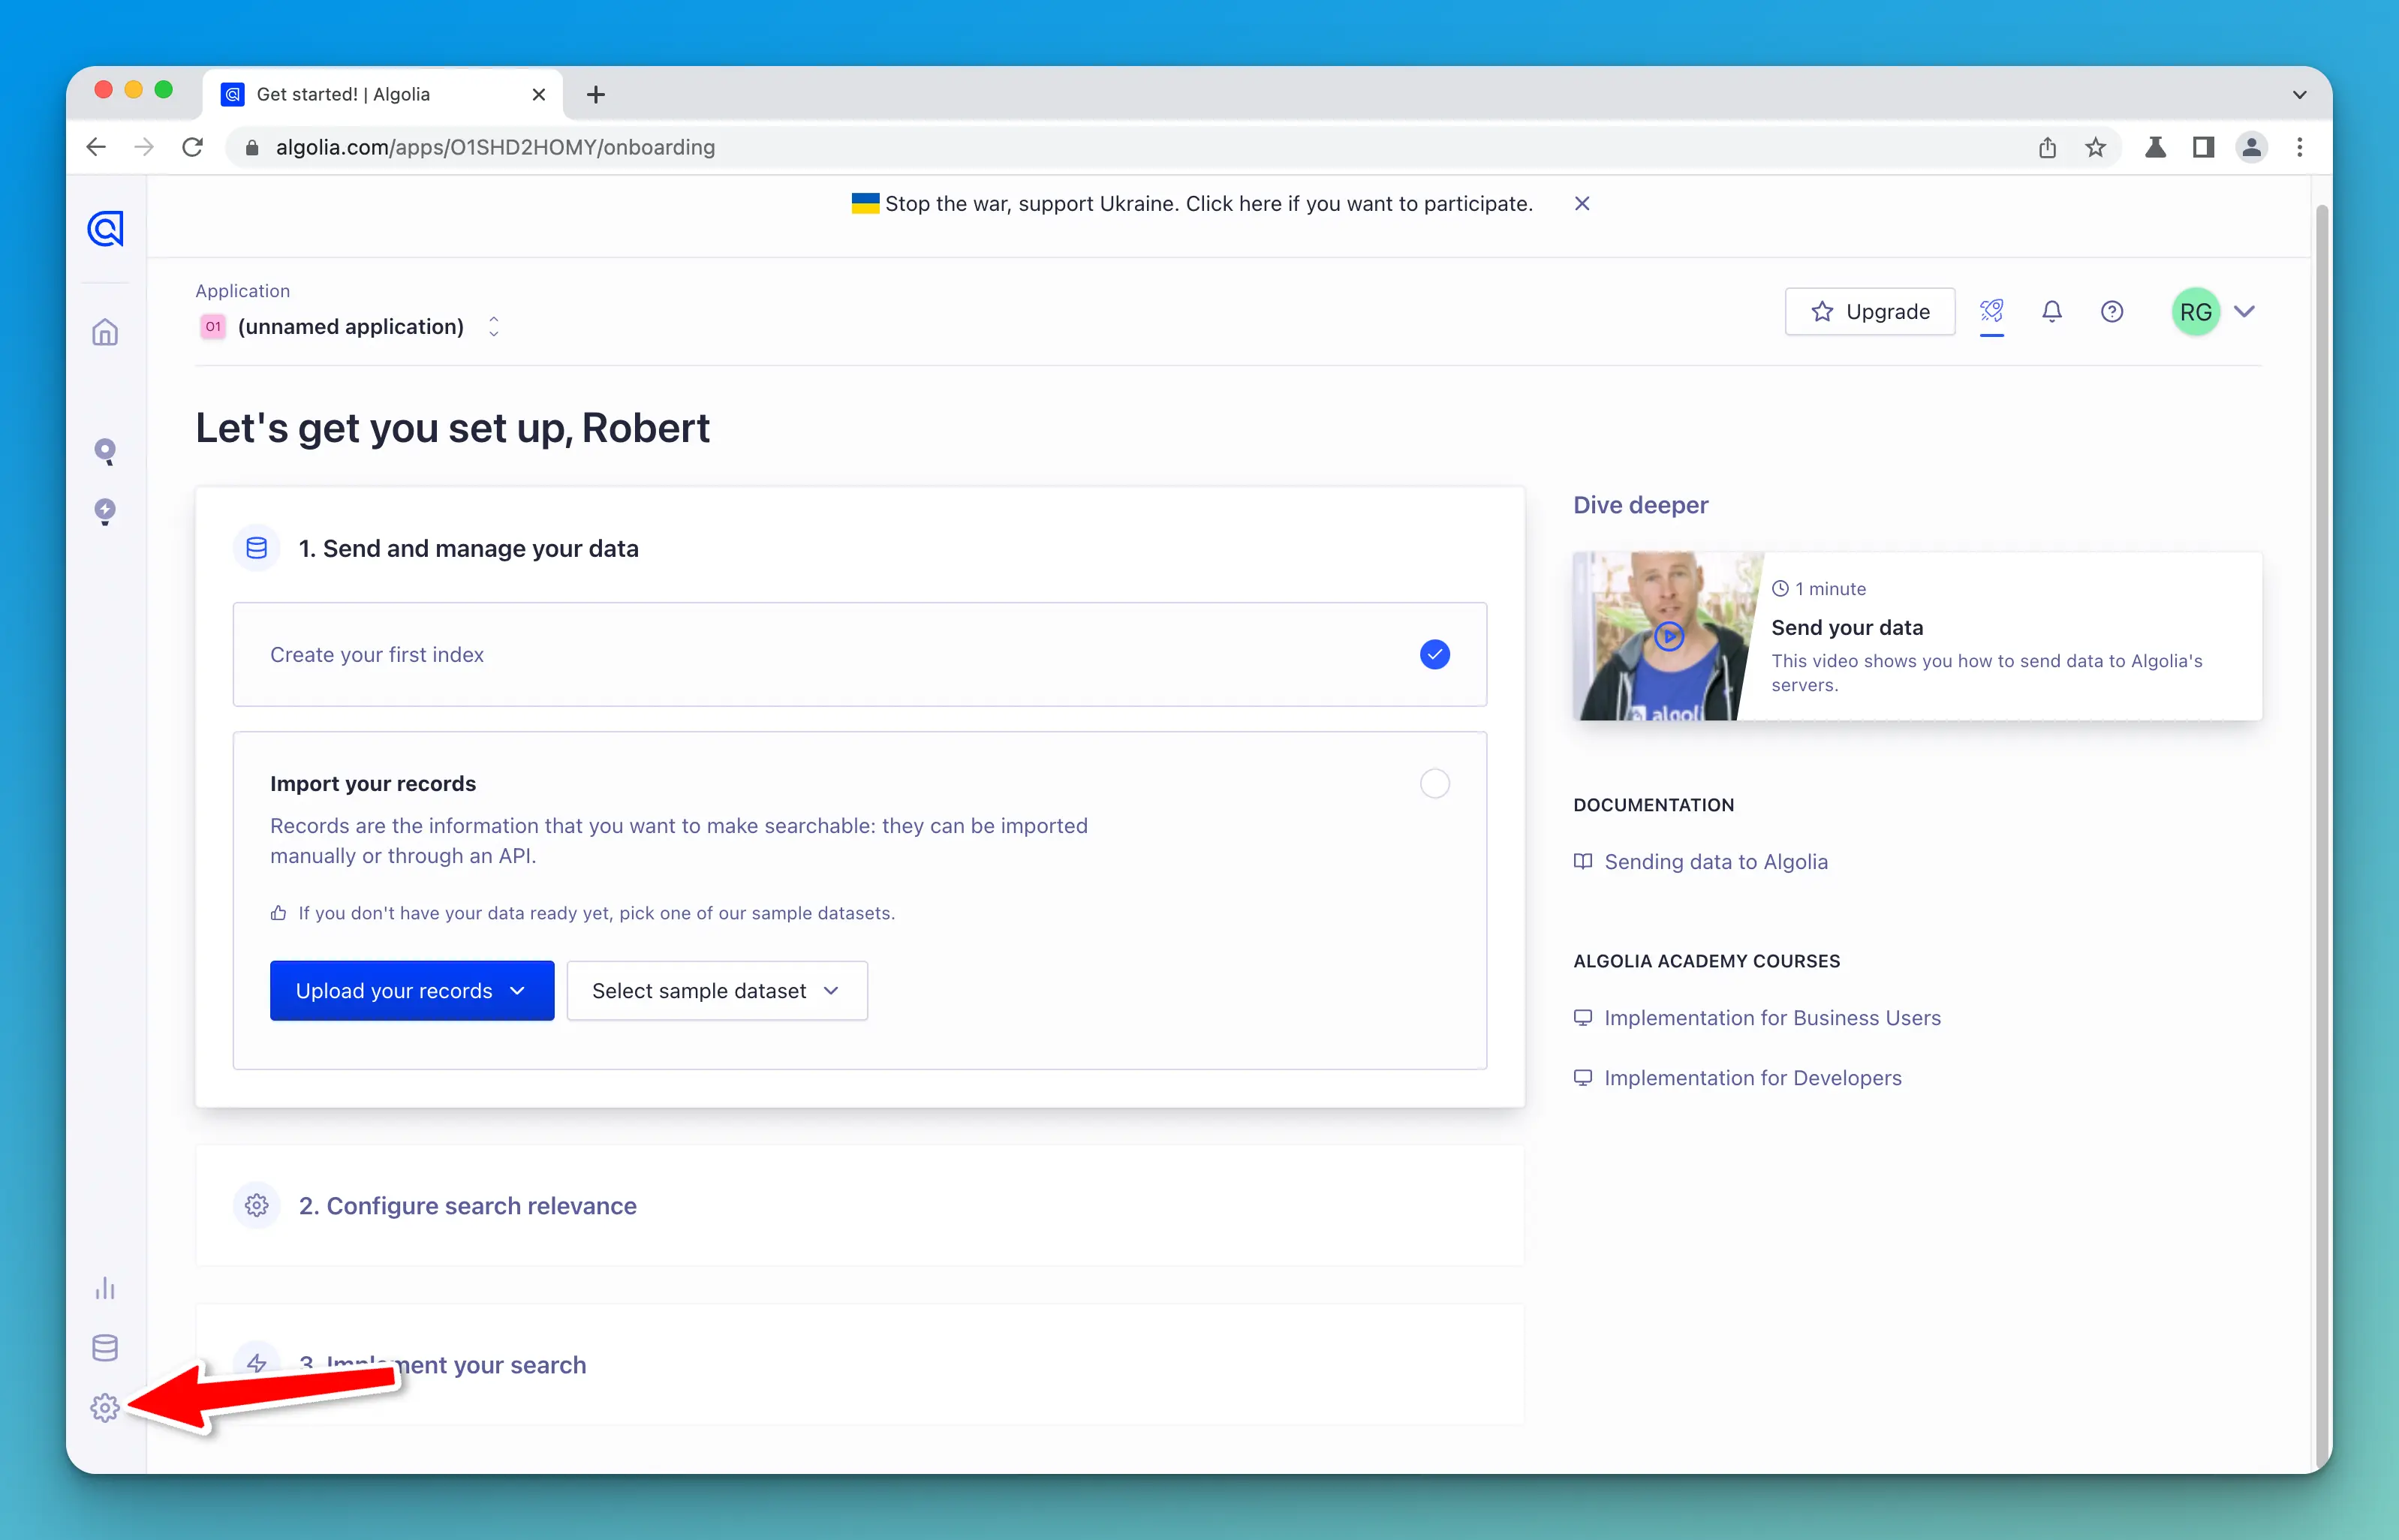
Next, you will need to copy your Application ID and API Key. Click on the settings icon in the bottom left corner.
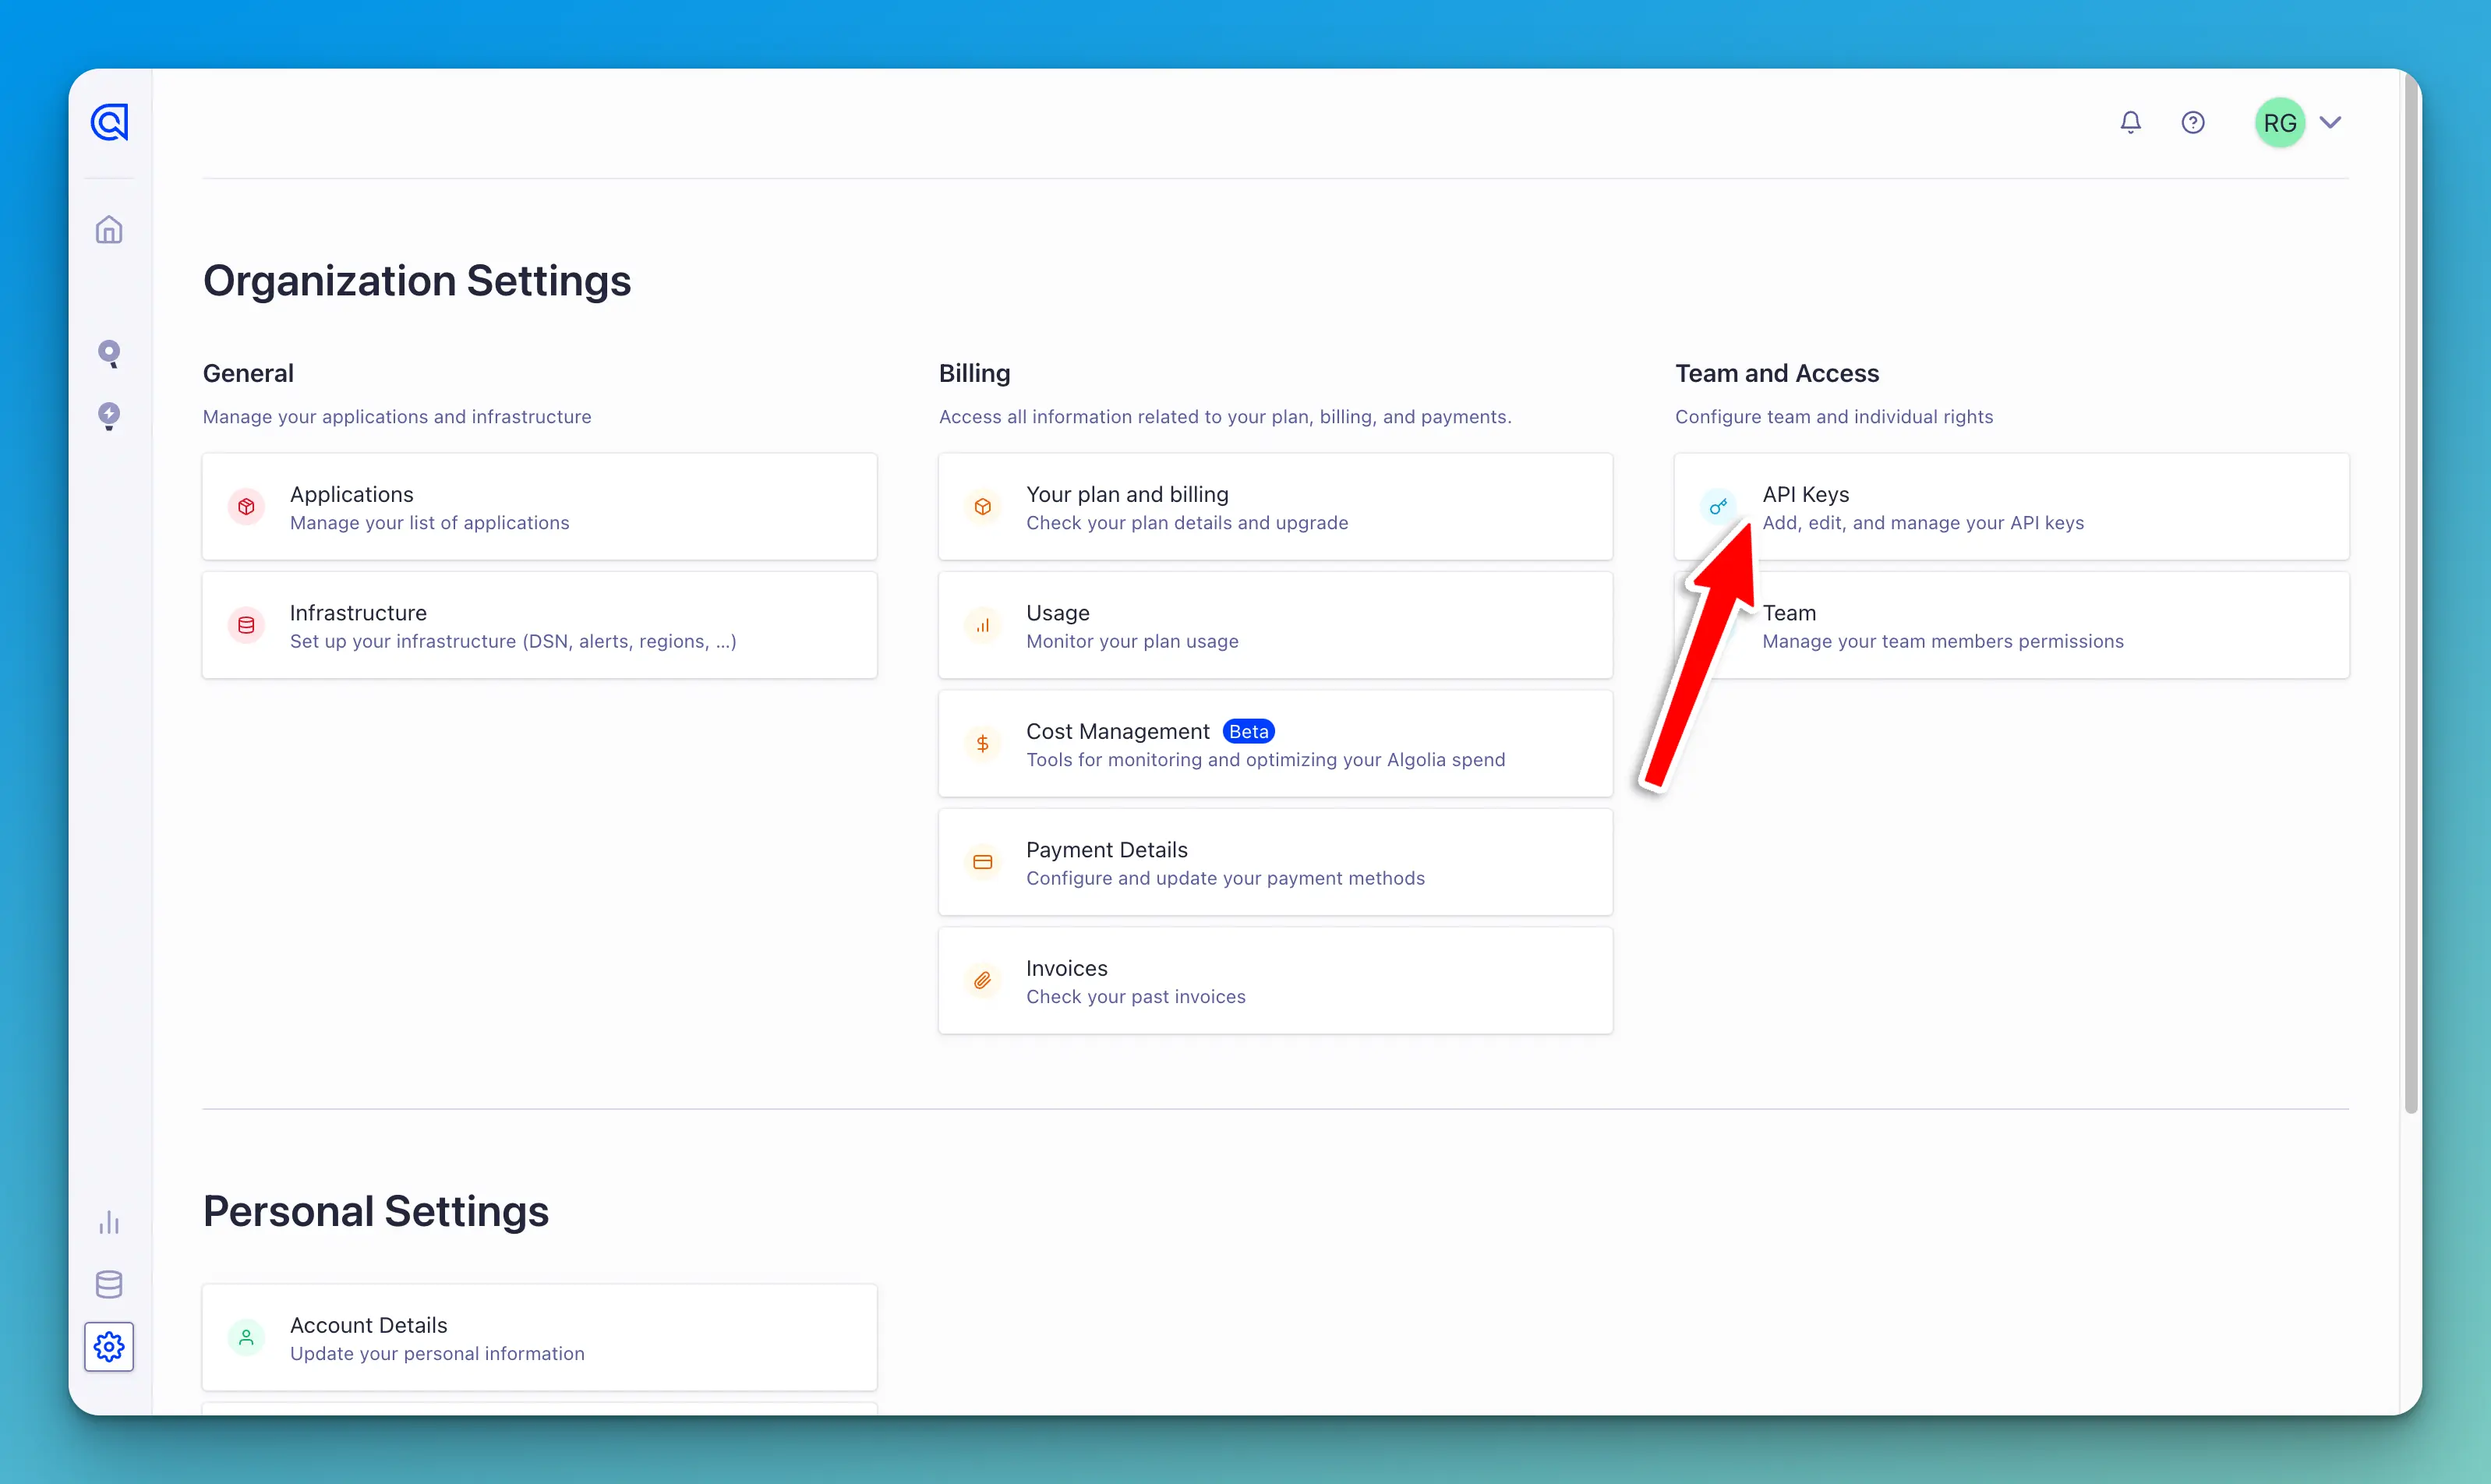
Then, click on API Keys.
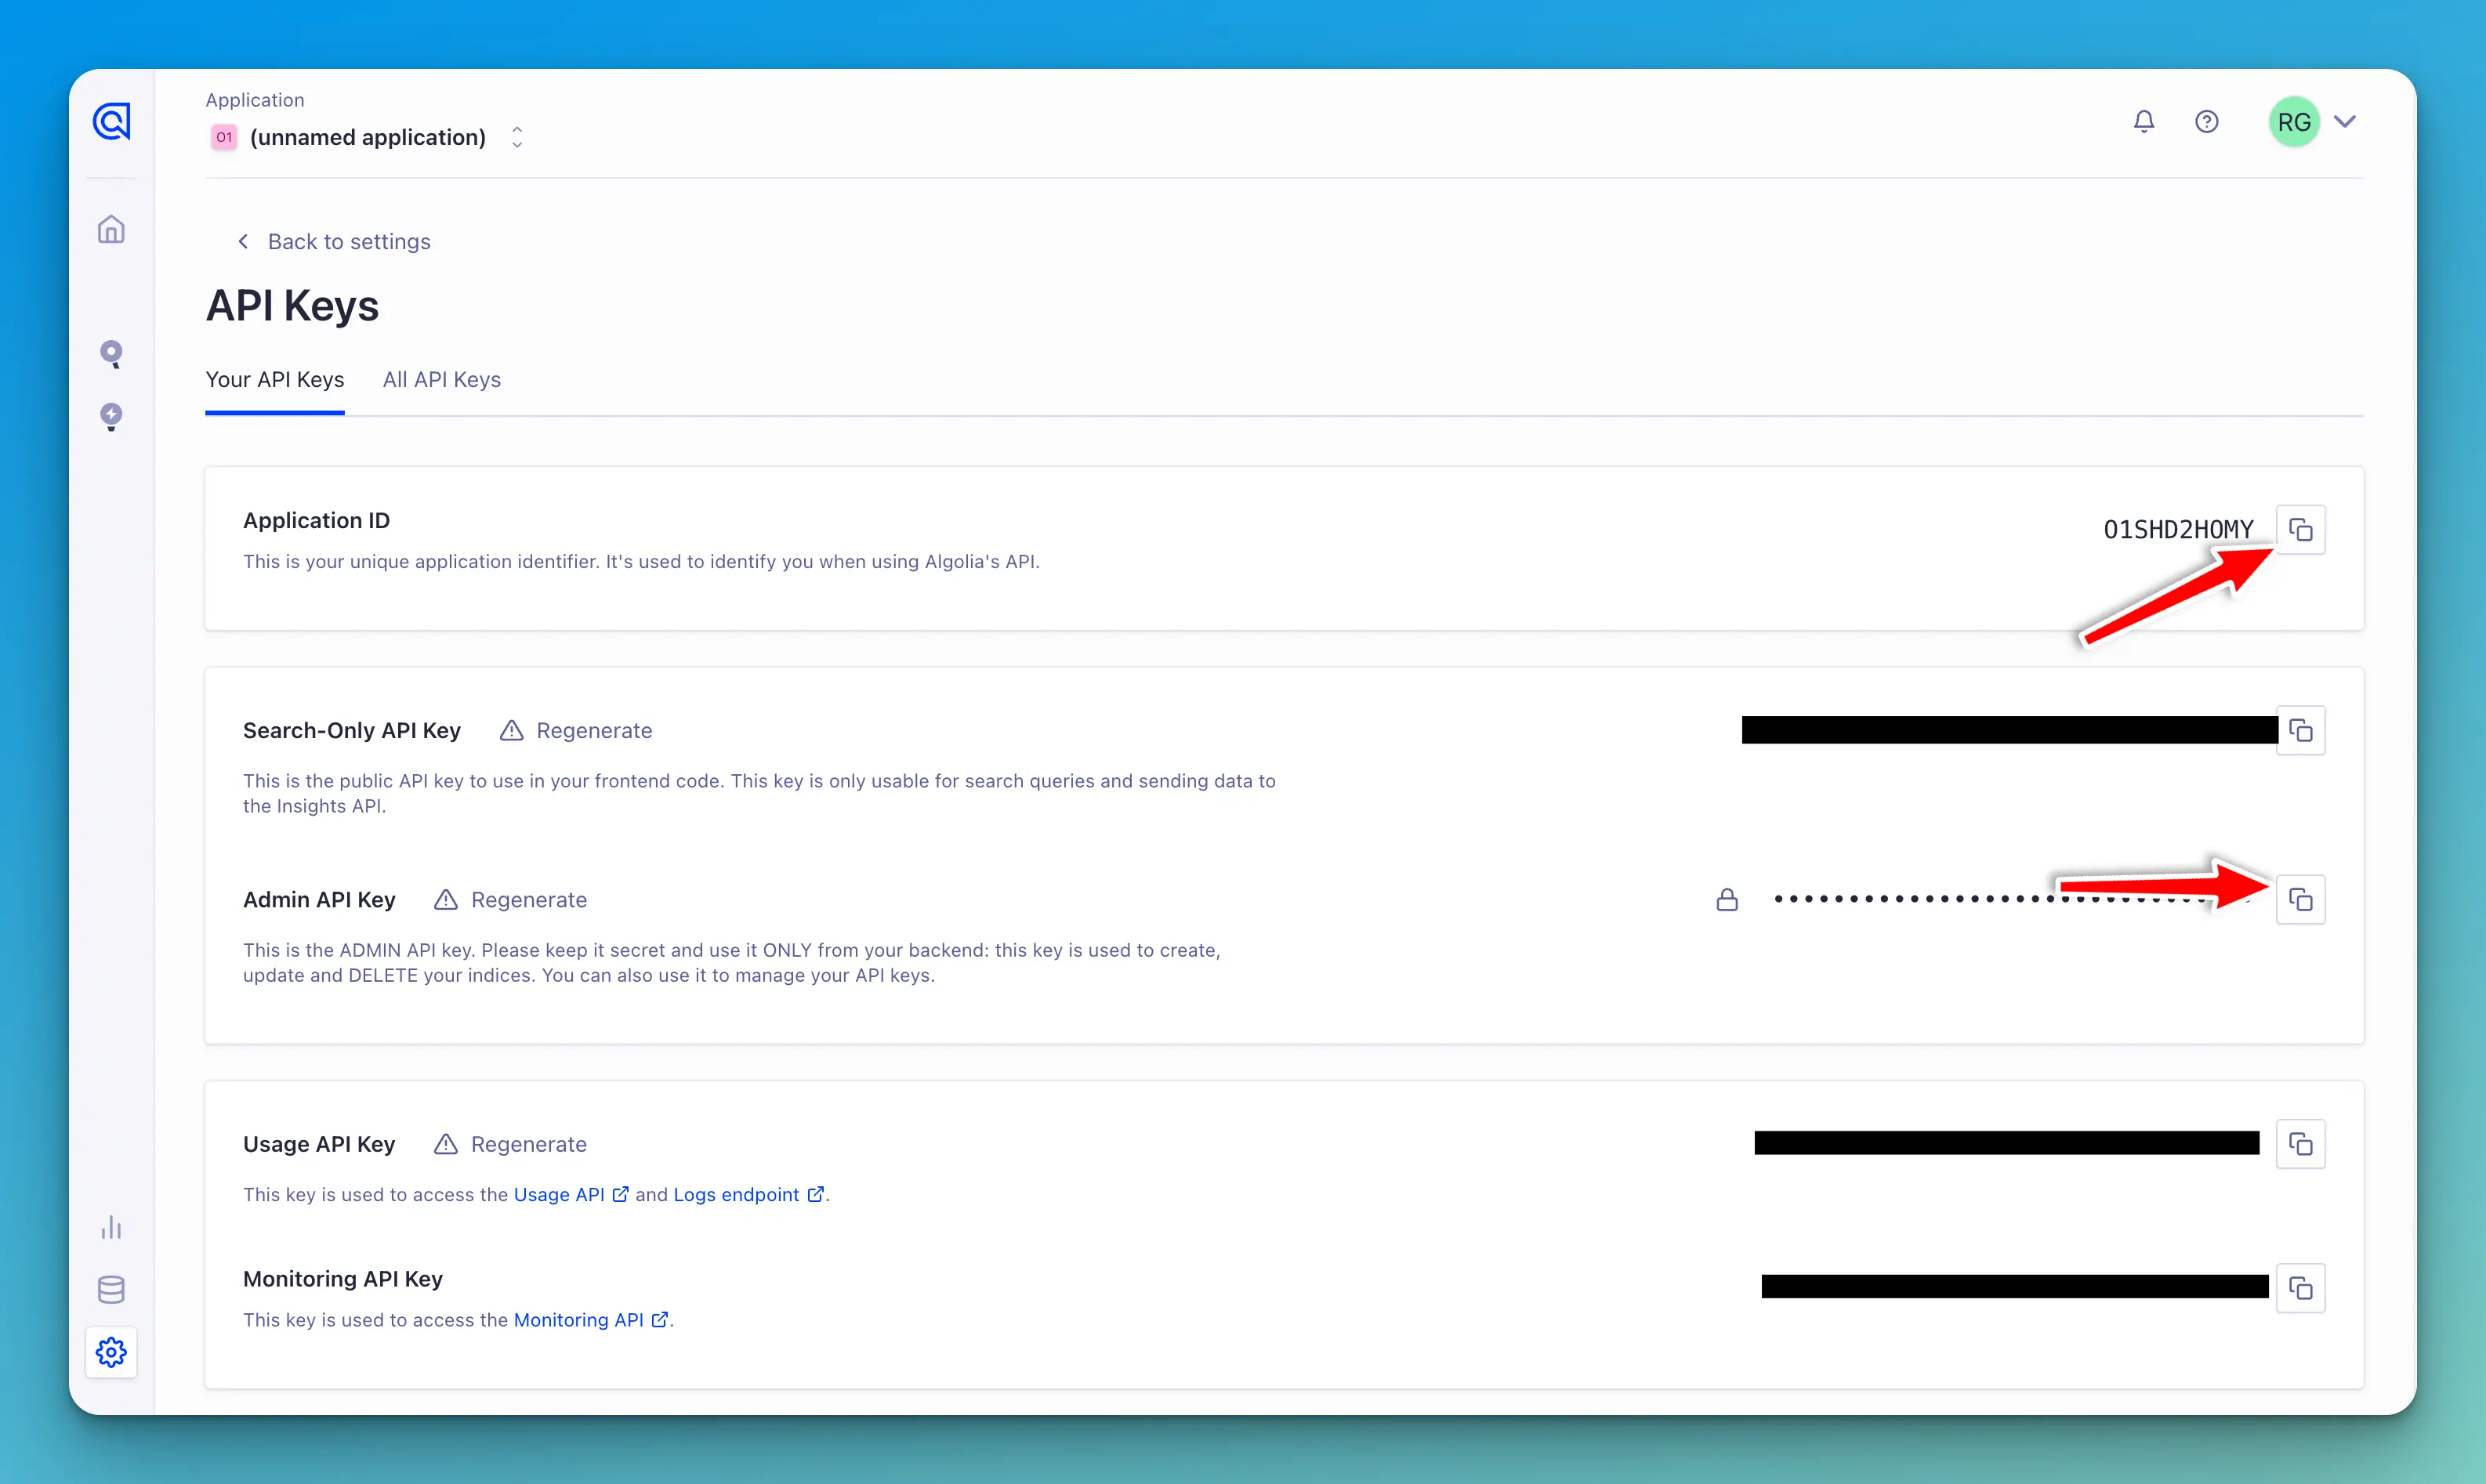
Next, per the DocSearch docs, you will need to copy both the Application ID and Admin API Key to a .env file in your project's repo.
#.env file
APPLICATION_ID=YOUR_APP_ID
API_KEY=YOUR_API_KEY
DocSearch config
Next, you will need to create a DocSearch config.json file, which will tell DocSearch how to crawl your site. You can use mine as a starting point and reference. You should also read and reference their docs which detail the various options available in this config file.
In my opinion, this documentation was not very clear, and I had to figure a lot of this out by trial and error. Here is what my final config looks like:
{
  "index_name": "prod_howtocode",
  "start_urls": [
    {
      "url": "https://www.howtocode.io/posts/free-resources/",
      "selectors_key": "free-resources",
      "tags": ["free-resources"]
    },
    {
      "url": "https://www.howtocode.io/posts/next-js/",
      "selectors_key": "next-js",
      "tags": ["next-js"]
    },
    {
      "url": "https://www.howtocode.io/posts/astro/",
      "selectors_key": "astro",
      "tags": ["astro"]
    },
    {
      "url": "https://www.howtocode.io/posts/go/",
      "selectors_key": "go",
      "tags": ["go"]
    },
    {
      "url": "https://www.howtocode.io/posts/elixir/",
      "selectors_key": "elixir",
      "tags": ["elixir"]
    },
    {
      "url": "https://www.howtocode.io/posts/cypress/",
      "selectors_key": "cypress",
      "tags": ["cypress"]
    },
    {
      "url": "https://www.howtocode.io/posts/writing-pkm/",
      "selectors_key": "writing-pkm",
      "tags": ["writing-pkm"]
    },
    {
      "url": "https://www.howtocode.io/posts/career-advice/",
      "selectors_key": "career-advice",
      "tags": ["career-advice"]
    },
    {
      "url": "https://www.howtocode.io/posts/jamstack/",
      "selectors_key": "jamstack",
      "tags": ["jamstack"]
    },
    {
      "url": "https://www.howtocode.io/posts/adonis-js/",
      "selectors_key": "adonis-js",
      "tags": ["adonis-js"]
    },
    {
      "url": "https://www.howtocode.io/posts/tailwind-css/",
      "selectors_key": "tailwind-css",
      "tags": ["tailwind-css"]
    },
    {
      "url": "https://www.howtocode.io/posts/statamic/",
      "selectors_key": "statamic",
      "tags": ["statamic"]
    },
    {
      "url": "https://www.howtocode.io/posts/hugo/",
      "selectors_key": "hugo",
      "tags": ["hugo"]
    },
    {
      "url": "https://www.howtocode.io/posts/javascript/",
      "selectors_key": "javascript",
      "tags": ["javascript"]
    },
    "https://www.howtocode.io/"
  ],
  "sitemap_urls": ["https://www.howtocode.io/sitemap-0.xml"],
  "selectors": {
    "free-resources": {
      "lvl0": {
        "selector": "  ",
        "default_value": "Free Resources"
      },
      "lvl1": ".main-content header h1",
      "lvl2": ".main-content .prose h2",
      "lvl3": ".main-content .prose h3",
      "lvl4": ".main-content .prose h4",
      "text": ".main-content .prose p,.main-content .prose li"
    },
    "next-js": {
      "lvl0": {
        "selector": "  ",
        "default_value": "Next.js"
      },
      "lvl1": ".main-content header h1",
      "lvl2": ".main-content .prose h2",
      "lvl3": ".main-content .prose h3",
      "lvl4": ".main-content .prose h4",
      "text": ".main-content .prose p,.main-content .prose li"
    },
    "astro": {
      "lvl0": {
        "selector": "  ",
        "default_value": "Astro"
      },
      "lvl1": ".main-content header h1",
      "lvl2": ".main-content .prose h2",
      "lvl3": ".main-content .prose h3",
      "lvl4": ".main-content .prose h4",
      "text": ".main-content .prose p,.main-content .prose li"
    },
    "go": {
      "lvl0": {
        "selector": "  ",
        "default_value": "Go"
      },
      "lvl1": ".main-content header h1",
      "lvl2": ".main-content .prose h2",
      "lvl3": ".main-content .prose h3",
      "lvl4": ".main-content .prose h4",
      "text": ".main-content .prose p,.main-content .prose li"
    },
    "elixir": {
      "lvl0": {
        "selector": "  ",
        "default_value": "Elixir"
      },
      "lvl1": ".main-content header h1",
      "lvl2": ".main-content .prose h2",
      "lvl3": ".main-content .prose h3",
      "lvl4": ".main-content .prose h4",
      "text": ".main-content .prose p,.main-content .prose li"
    },
    "cypress": {
      "lvl0": {
        "selector": "  ",
        "default_value": "Cypress"
      },
      "lvl1": ".main-content header h1",
      "lvl2": ".main-content .prose h2",
      "lvl3": ".main-content .prose h3",
      "lvl4": ".main-content .prose h4",
      "text": ".main-content .prose p,.main-content .prose li"
    },
    "writing-pkm": {
      "lvl0": {
        "selector": "  ",
        "default_value": "Writing & PKM"
      },
      "lvl1": ".main-content header h1",
      "lvl2": ".main-content .prose h2",
      "lvl3": ".main-content .prose h3",
      "lvl4": ".main-content .prose h4",
      "text": ".main-content .prose p,.main-content .prose li"
    },
    "career-advice": {
      "lvl0": {
        "selector": "  ",
        "default_value": "Career Advice"
      },
      "lvl1": ".main-content header h1",
      "lvl2": ".main-content .prose h2",
      "lvl3": ".main-content .prose h3",
      "lvl4": ".main-content .prose h4",
      "text": ".main-content .prose p,.main-content .prose li"
    },
    "jamstack": {
      "lvl0": {
        "selector": "  ",
        "default_value": "Jamstack"
      },
      "lvl1": ".main-content header h1",
      "lvl2": ".main-content .prose h2",
      "lvl3": ".main-content .prose h3",
      "lvl4": ".main-content .prose h4",
      "text": ".main-content .prose p,.main-content .prose li"
    },
    "adonis-js": {
      "lvl0": {
        "selector": "  ",
        "default_value": "Adonis JS"
      },
      "lvl1": ".main-content header h1",
      "lvl2": ".main-content .prose h2",
      "lvl3": ".main-content .prose h3",
      "lvl4": ".main-content .prose h4",
      "text": ".main-content .prose p,.main-content .prose li"
    },
    "tailwind-css": {
      "lvl0": {
        "selector": "  ",
        "default_value": "Tailwind CSS"
      },
      "lvl1": ".main-content header h1",
      "lvl2": ".main-content .prose h2",
      "lvl3": ".main-content .prose h3",
      "lvl4": ".main-content .prose h4",
      "text": ".main-content .prose p,.main-content .prose li"
    },
    "statamic": {
      "lvl0": {
        "selector": "  ",
        "default_value": "Statamic"
      },
      "lvl1": ".main-content header h1",
      "lvl2": ".main-content .prose h2",
      "lvl3": ".main-content .prose h3",
      "lvl4": ".main-content .prose h4",
      "text": ".main-content .prose p,.main-content .prose li"
    },
    "hugo": {
      "lvl0": {
        "selector": "  ",
        "default_value": "Hugo"
      },
      "lvl1": ".main-content header h1",
      "lvl2": ".main-content .prose h2",
      "lvl3": ".main-content .prose h3",
      "lvl4": ".main-content .prose h4",
      "text": ".main-content .prose p,.main-content .prose li"
    },
    "javascript": {
      "lvl0": {
        "selector": "  ",
        "default_value": "JavaScript"
      },
      "lvl1": ".main-content header h1",
      "lvl2": ".main-content .prose h2",
      "lvl3": ".main-content .prose h3",
      "lvl4": ".main-content .prose h4",
      "text": ".main-content .prose p,.main-content .prose li"
    },
    "default": {
      "lvl0": {
        "selector": "  ",
        "default_value": "Articles"
      },
      "lvl1": ".main-content header h1",
      "lvl2": ".main-content .prose h2",
      "lvl3": ".main-content .prose h3",
      "lvl4": ".main-content .prose h4",
      "text": ".main-content .prose p,.main-content .prose li"
    }
  }
}
Index name
This code may seem overwhelming, so let's break this down.
First, you need to specify the name of your index in Algolia. This is the name you created in the previous section when setting up your account.
"index_name": "prod_howtocode",
Start URLs
Next in the config is start_urls. This is where you can tell the crawler which URLs to crawl.
"start_urls": [
    {
      "url": "https://www.howtocode.io/posts/free-resources/",
      "selectors_key": "free-resources",
      "tags": ["free-resources"]
    },
    {
      "url": "https://www.howtocode.io/posts/next-js/",
      "selectors_key": "next-js",
      "tags": ["next-js"]
    },
The reason why I have the start URLs configured the way that I do, is that I wanted my search results to look a certain way. My main inspiration was how the search works in the Tailwind CSS docs.
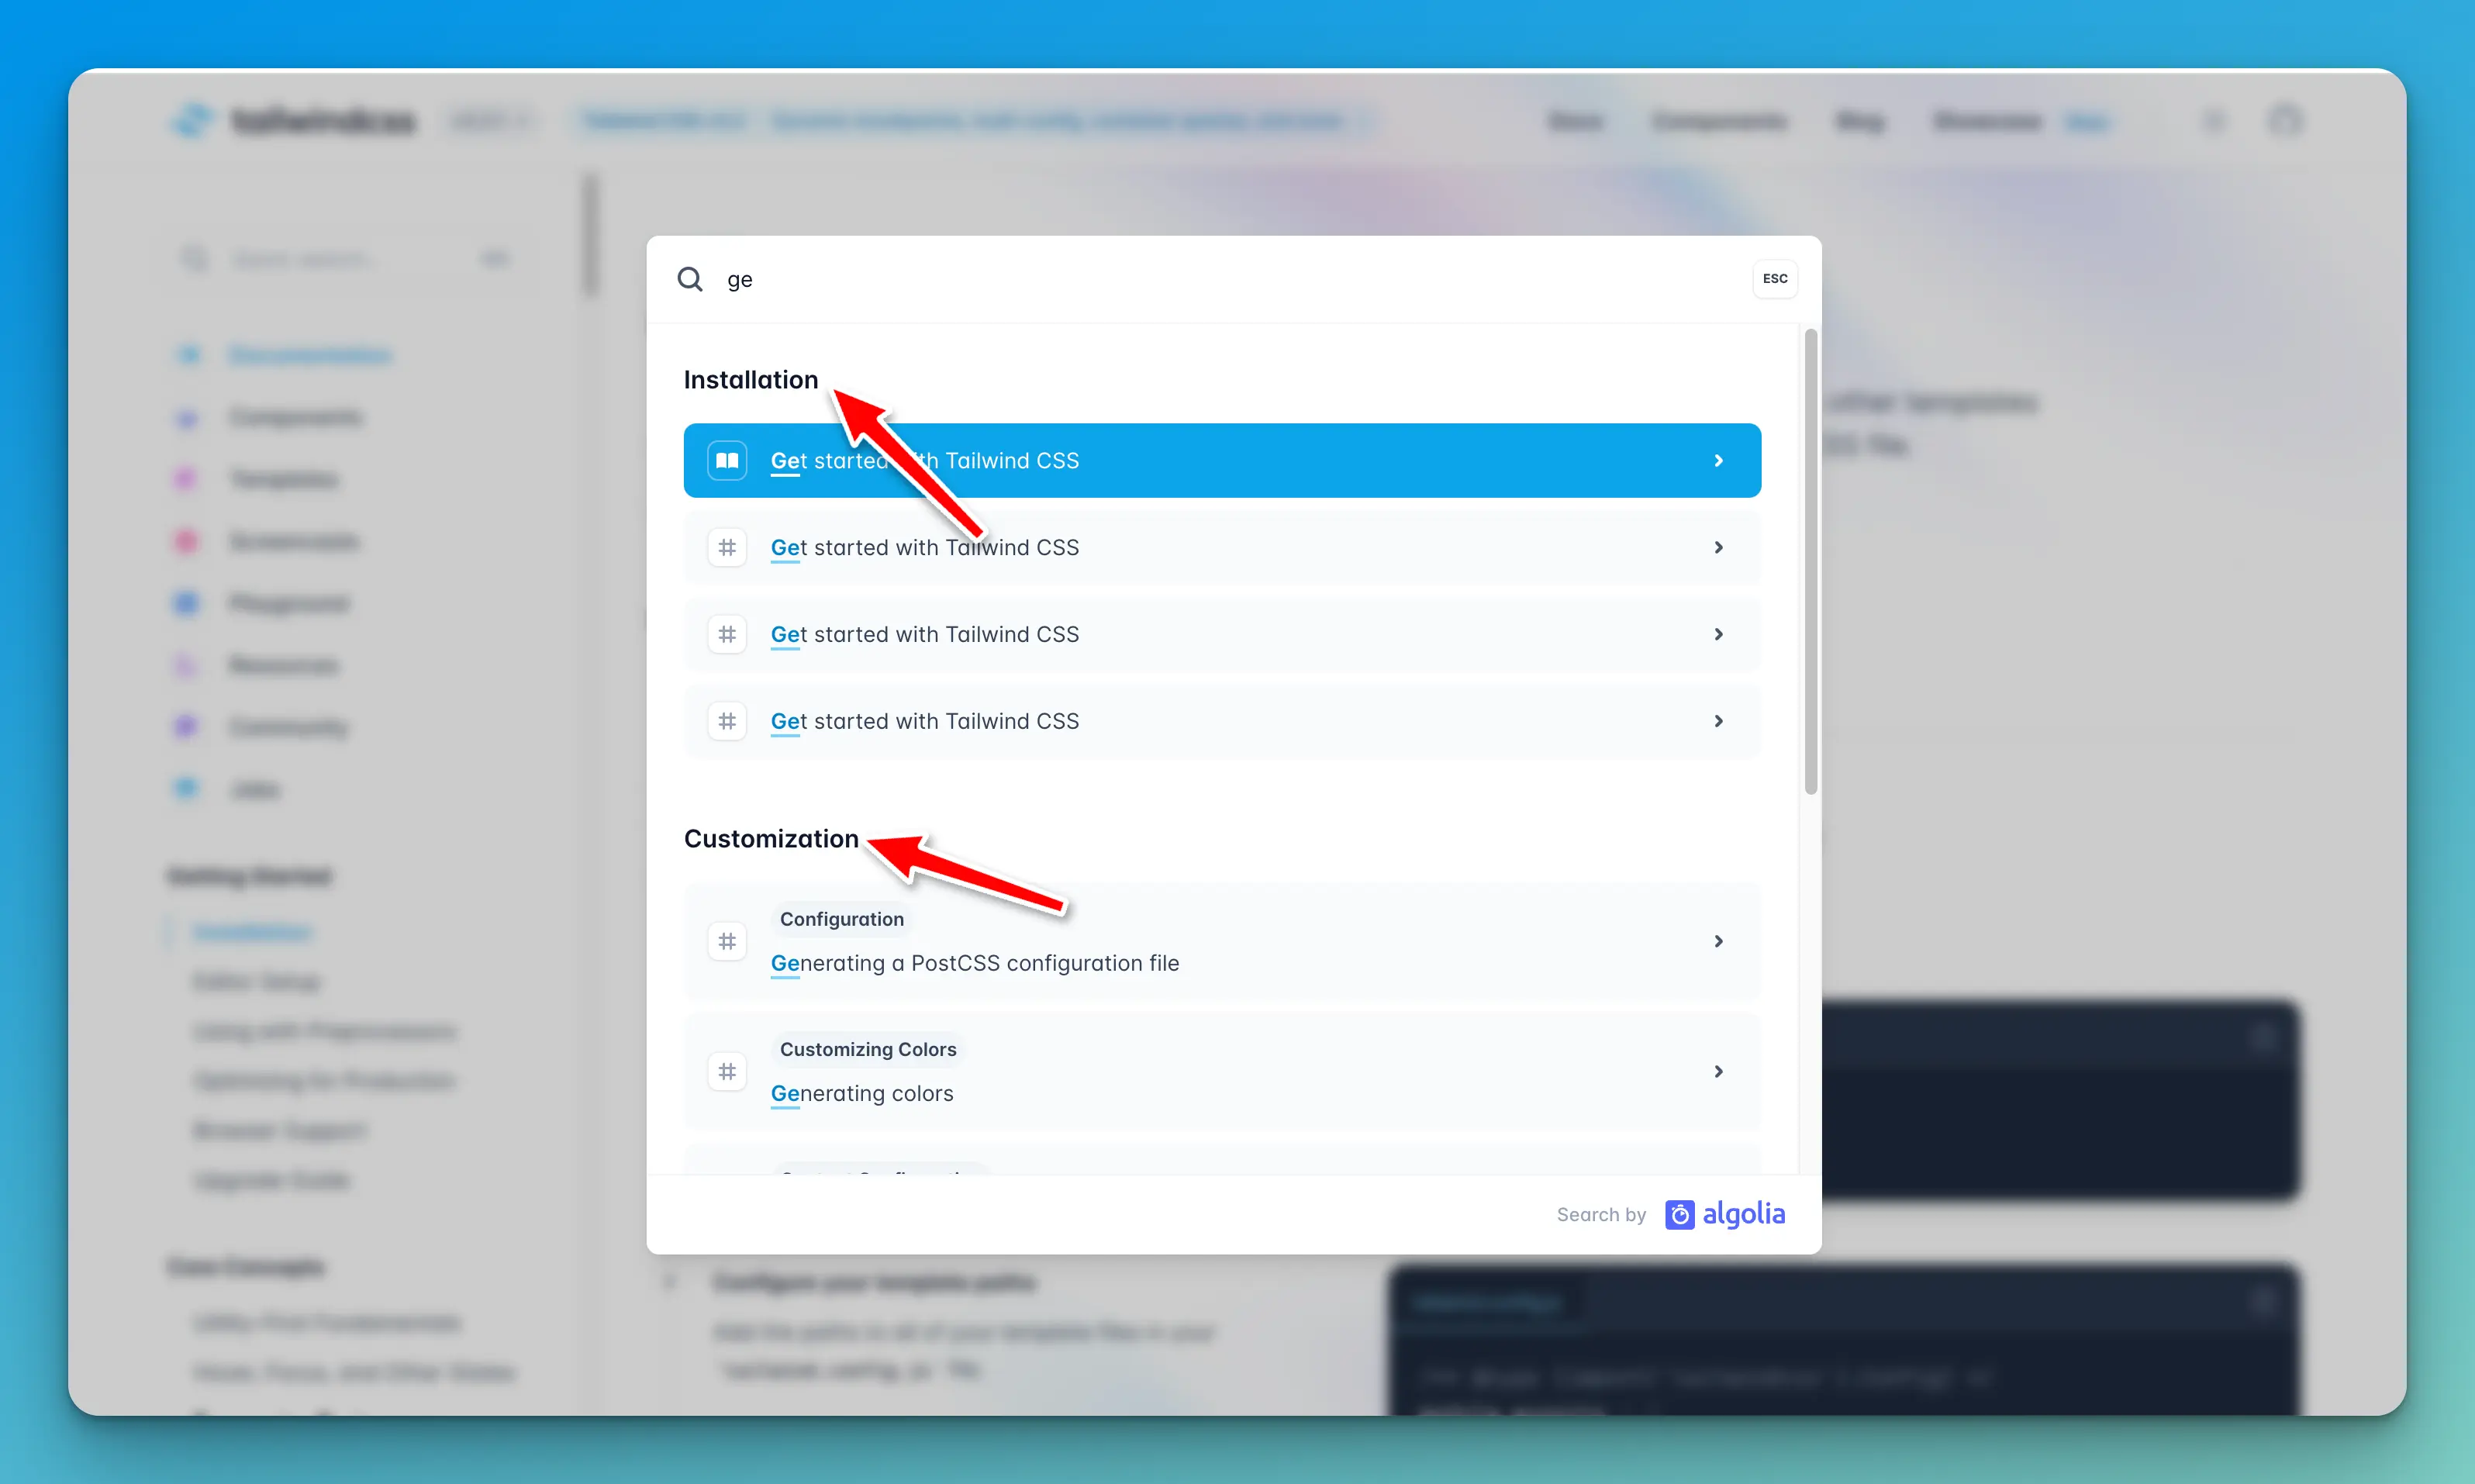
Specifically, I wanted headings to show in the search results so that users would know that the results belonged to a particular topic or tutorial.
This is why each URL has a selectors_key in it.
{
      "url": "https://www.howtocode.io/posts/free-resources/",
      "selectors_key": "free-resources",
      "tags": ["free-resources"]
    },
I am not currently using tags, but you can add tags to certain search records in Algolia if you want to organize and sort your searches by tags.
Sitemap URLs
Next is the sitemap_urls. I added this to ensure that all of my site's pages are crawled.
"sitemap_urls": ["https://www.howtocode.io/sitemap-0.xml"],
Selectors
The final and most important section is the selectors section.
"selectors": {
    "free-resources": {
      "lvl0": {
        "selector":"  ",
        "default_value": "Free Resources"
      },
      "lvl1": ".main-content header h1",
      "lvl2": ".main-content .prose h2",
      "lvl3": ".main-content .prose h3",
      "lvl4": ".main-content .prose h4",
      "text": ".main-content .prose p,.main-content .prose li"
    },
    "next-js": {
      "lvl0": {
        "selector":"  ",
        "default_value": "Next.js"
      },
      "lvl1": ".main-content header h1",
      "lvl2": ".main-content .prose h2",
      "lvl3": ".main-content .prose h3",
      "lvl4": ".main-content .prose h4",
      "text": ".main-content .prose p,.main-content .prose li"
    },
This was the most confusing part for me, so I will explain this as best as possible. The first URL I have in the start_urls array is:
"start_urls": [
    {
      "url": "https://www.howtocode.io/posts/free-resources/",
      "selectors_key": "free-resources",
      "tags": ["free-resources"]
    },
My selectors_key in this example is "free-resources". I then created an object with the same name under the selectors object like so:
"selectors": {
    "free-resources": {
      "lvl0": {
        "selector":"  ",
        "default_value": "Free Resources"
      },
      "lvl1": ".main-content header h1",
      "lvl2": ".main-content .prose h2",
      "lvl3": ".main-content .prose h3",
      "lvl4": ".main-content .prose h4",
      "text": ".main-content .prose p,.main-content .prose li"
    },
This is how I got those nice headings for my search results.
There are various levels that tell the crawler the parts of your page that are most important. In this config, the lvl0 become the headings in the search results. Notice how I leave the selector blank and then provide a default_value with the name of my heading.
"free-resources": {
      "lvl0": {
        "selector":"  ",
        "default_value": "Free Resources"
      },
Whatever value you give to default_value will become the heading in your search results. The other levels are for h1, h2, h3, h4, p, and li, HTML elements.
"free-resources": {
      "lvl0": {
        "selector":"  ",
        "default_value": "Free Resources"
      },
      "lvl1": ".main-content header h1",
      "lvl2": ".main-content .prose h2",
      "lvl3": ".main-content .prose h3",
      "lvl4": ".main-content .prose h4",
      "text": ".main-content .prose p,.main-content .prose li"
    },
This is how you let the crawler know the importance and hierarchy of your site's content.
Repeat this object for all URLs in the start_urls array.
You must also create a default object that will be used for any URLs that the crawler does not find a match for in the start_urls array.
"default": {
      "lvl0": {
        "selector":"  ",
        "default_value": "Articles"
      },
      "lvl1": ".main-content header h1",
      "lvl2": ".main-content .prose h2",
      "lvl3": ".main-content .prose h3",
      "lvl4": ".main-content .prose h4",
      "text": ".main-content .prose p,.main-content .prose li"
    }
Running the crawler
Now that our search index in Algolia has been created and our config.json is complete, it is time to run the crawler.
With Docker running, you can run the crawler with the following command:
docker run -it --env-file=.env.local -e "CONFIG=$(cat src/algolia/config.json | jq -r tostring)" algolia/docsearch-scraper
I named my env file as .env.local, which contains my Algolia Application ID and API key.
--env-file=.env.local
If your file is named .env you can update the command to be
docker run -it --env-file=.env
Next, you will need to specify the location, src/algolia/config.json of the Algolia config.json we just created.
"CONFIG=$(cat src/algolia/config.json | jq -r tostring)"
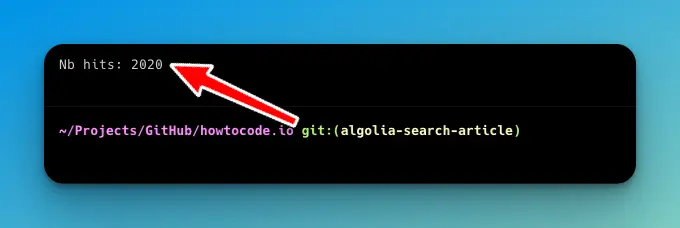
Finally, run the command. If everything is setup correctly, you should see the following in your terminal:
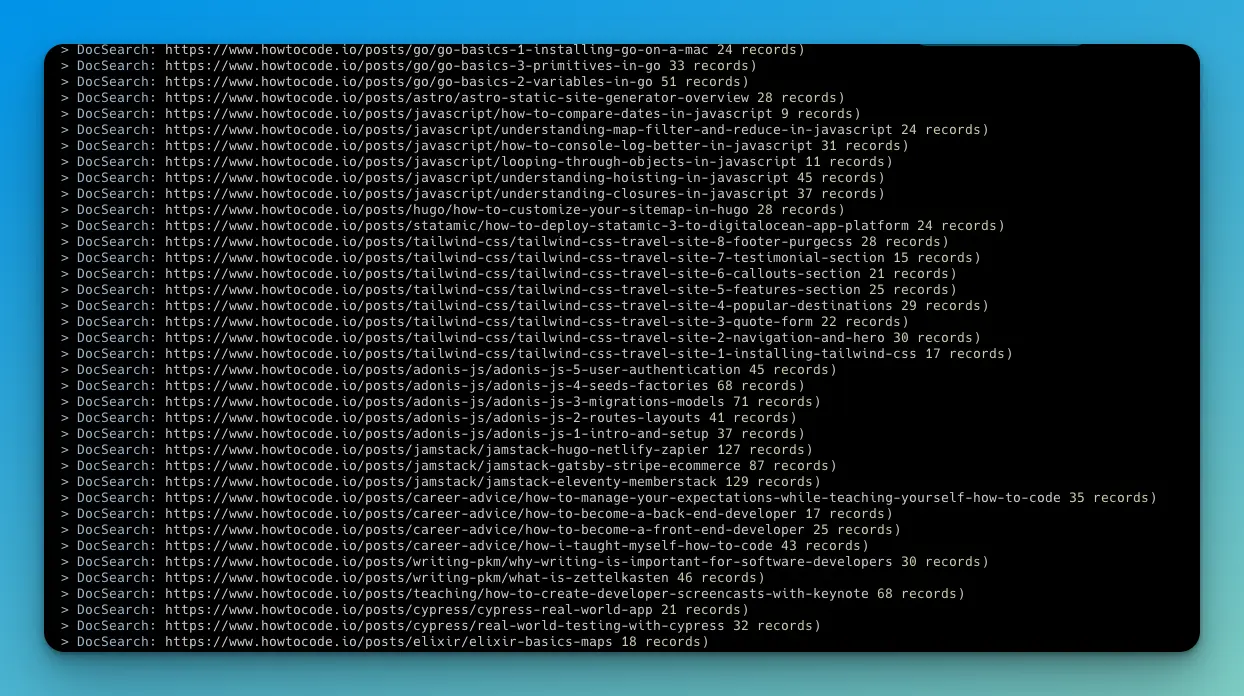
Algolia dashboard
Next, confirm that DocSearch sent all the records to our index. Open the Algolia dashboard and click on the search icon in the left sidebar.
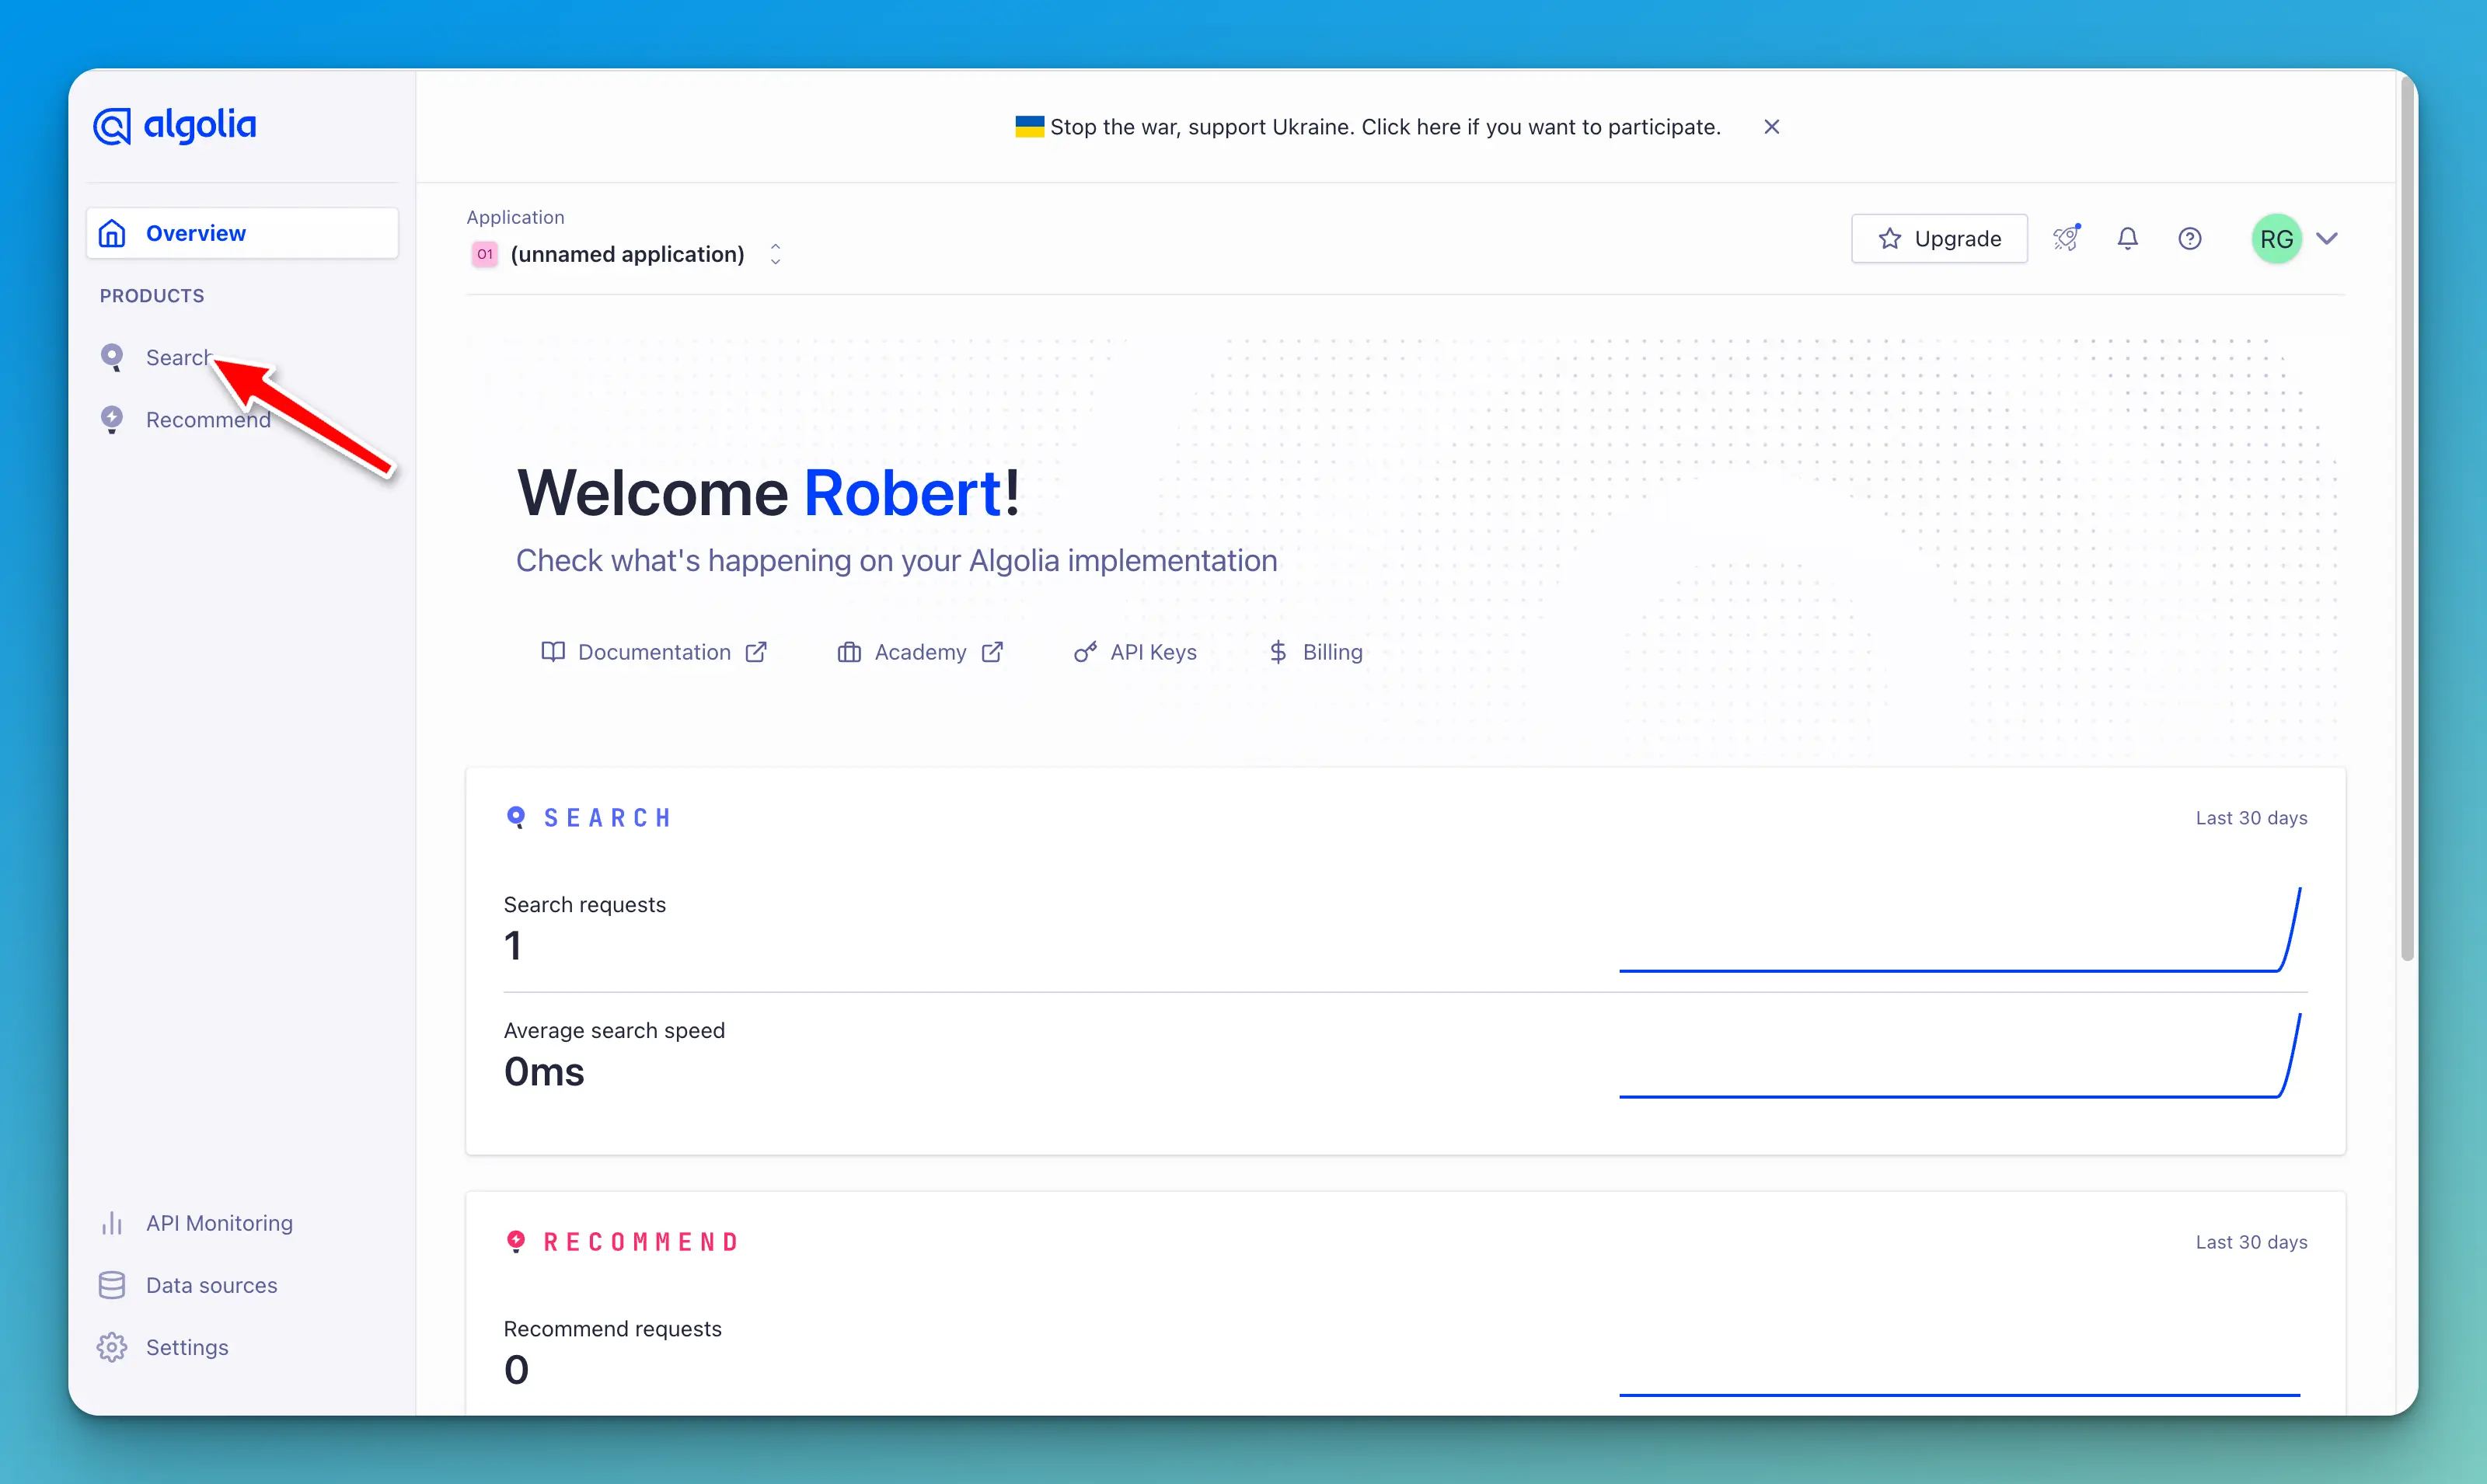
You should see a bunch of new records in your index.
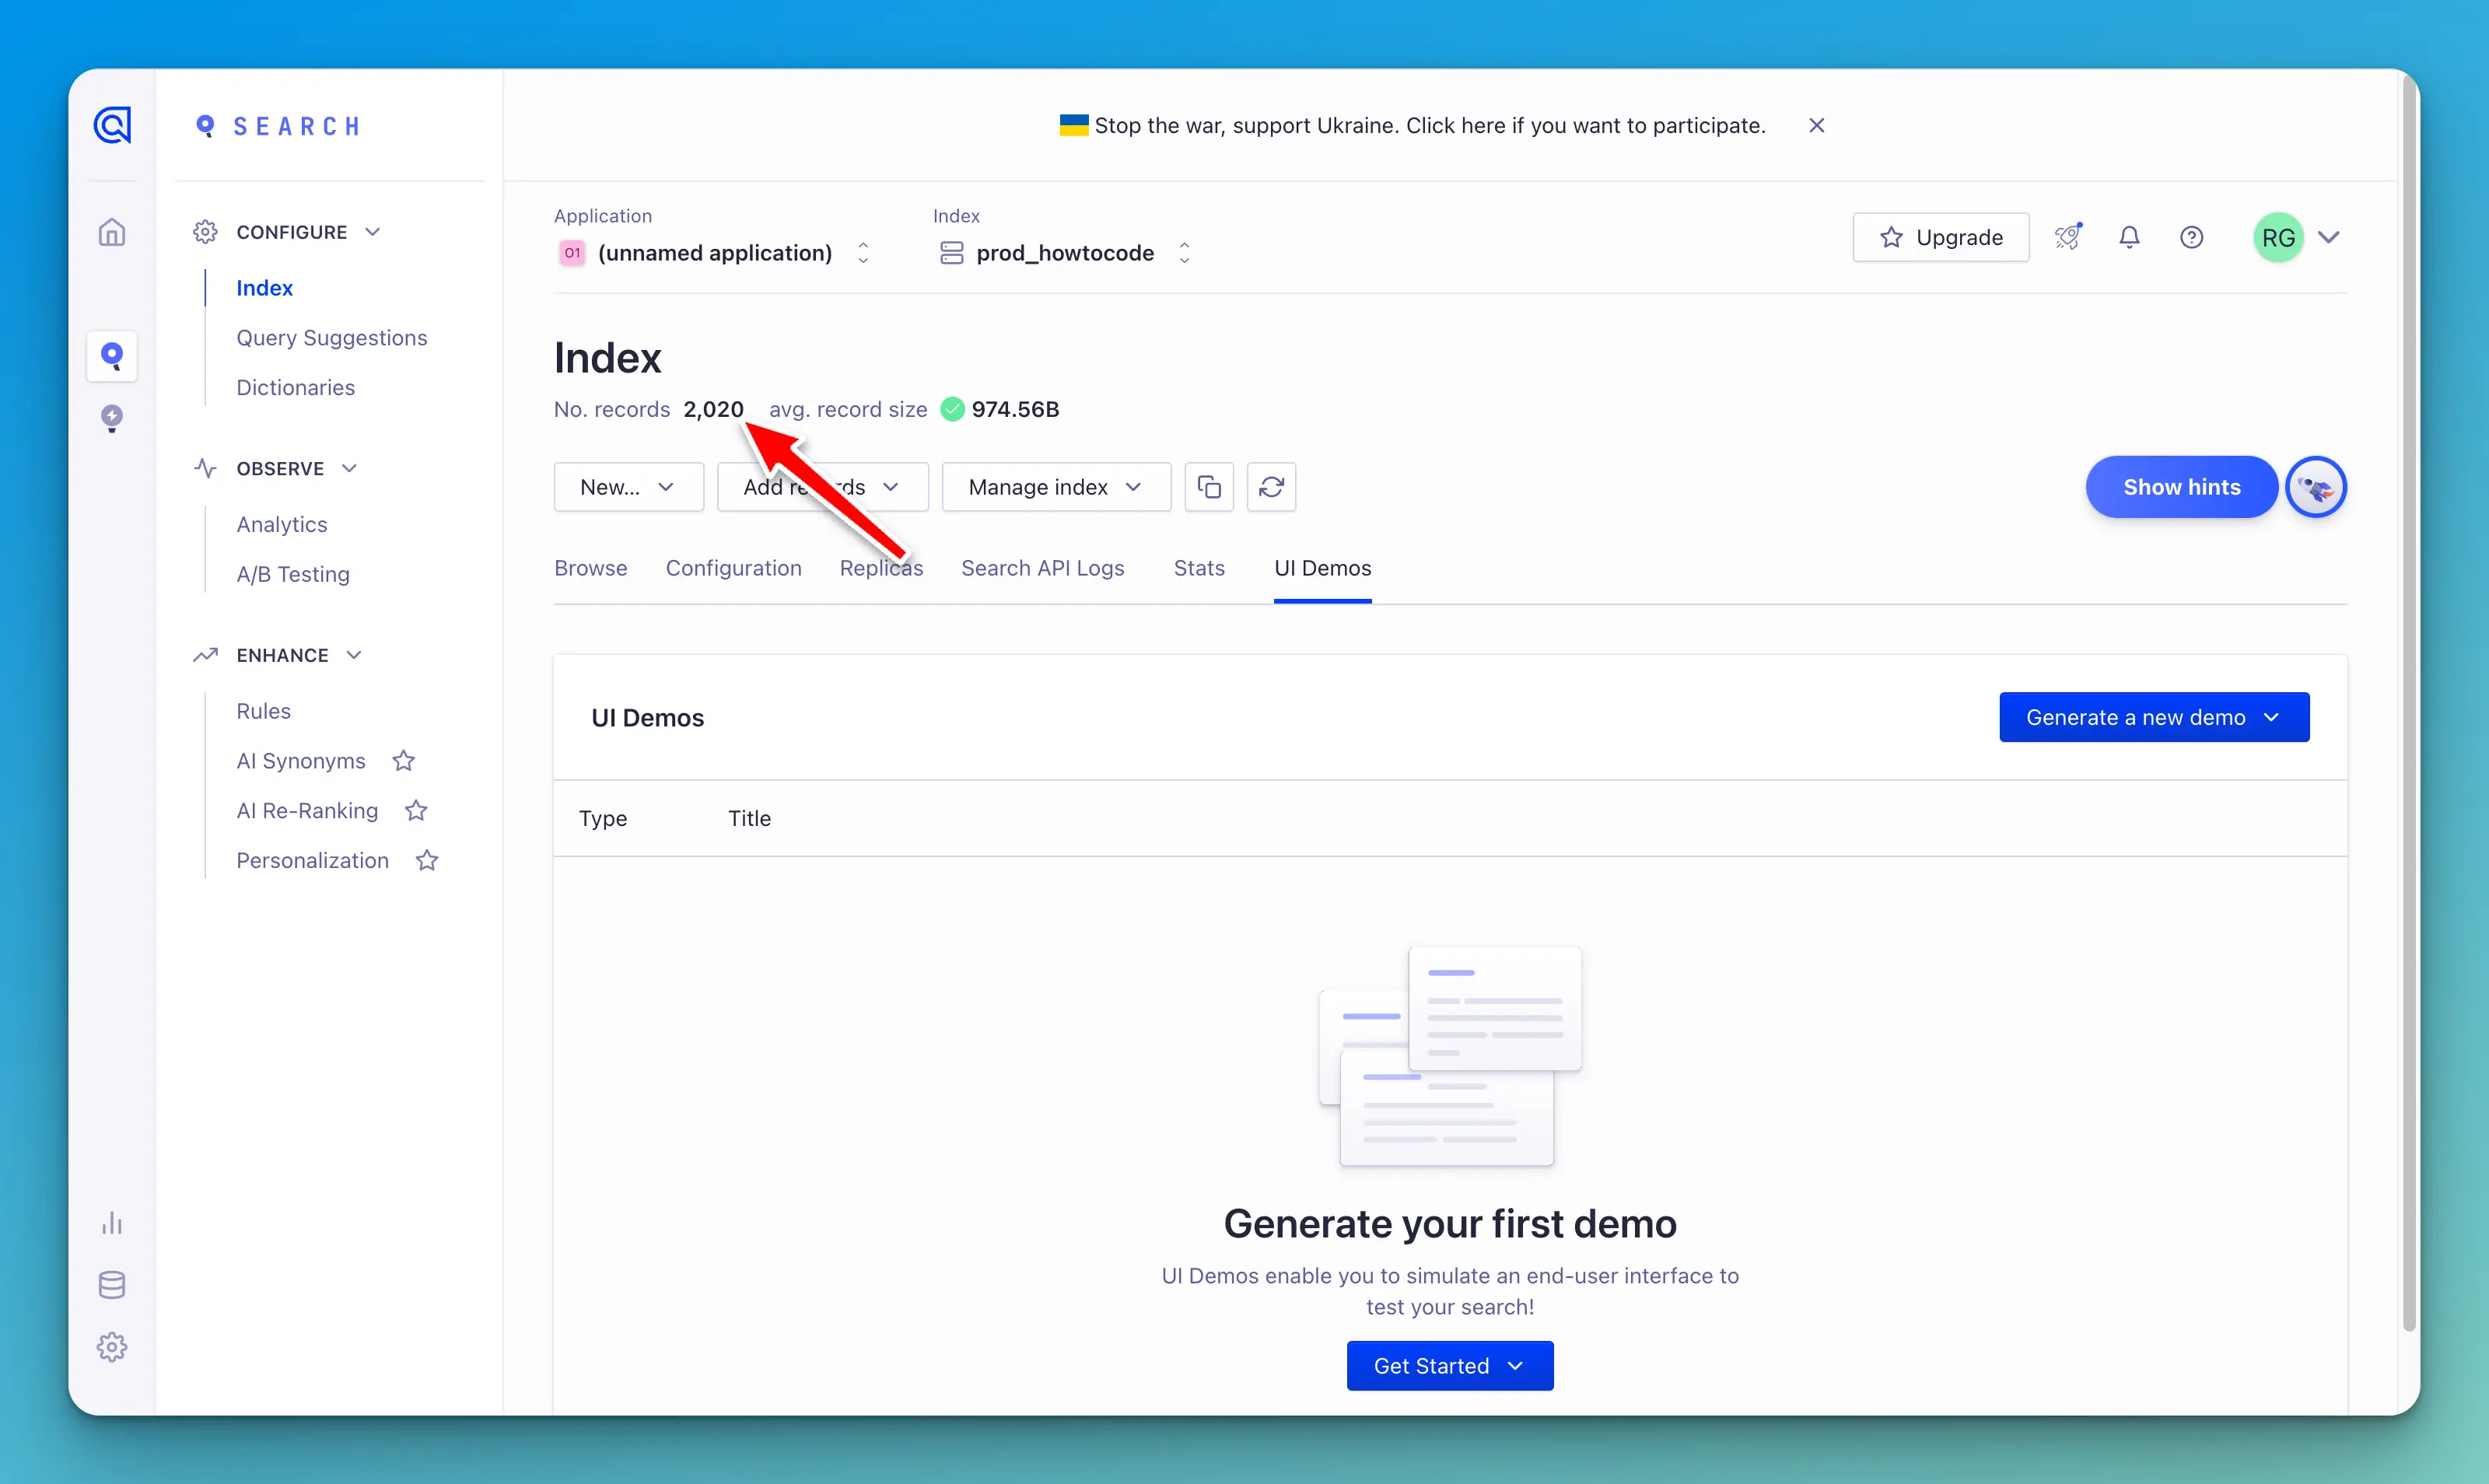
This number should be the same as the Nb hits output in your terminal.
GitHub actions
Now that we know DocSearch is working, we can create a GitHub action that will crawl our site whenever we tell it to. In your project repo, paste the following inside of .github/workflows/main.yml
name: Algolia DocSearch

on:
  schedule:
    - cron: '0 9 * * 1'

jobs:
  docsearch:
    runs-on: ubuntu-latest
    name: Algolia DocSearch
    steps:
      - uses: actions/checkout@v2
      - uses: darrenjennings/algolia-docsearch-action@master
        with:
          algolia_api_key: ${{ secrets.ALGOLIA_API_KEY }}
          algolia_application_id: ${{ secrets.ALGOLIA_APPLICATION_ID }}
          # needs to be inside $GITHUB_WORKSPACE from actions/checkout step
          file: 'src/algolia/config.json'
In this example, I have set up a cron job to run the DocSearch crawler every Monday at 9 am.
Crontab.guru
Crontab.guru is a helpful site that will allow you to easily understand cron schedules.
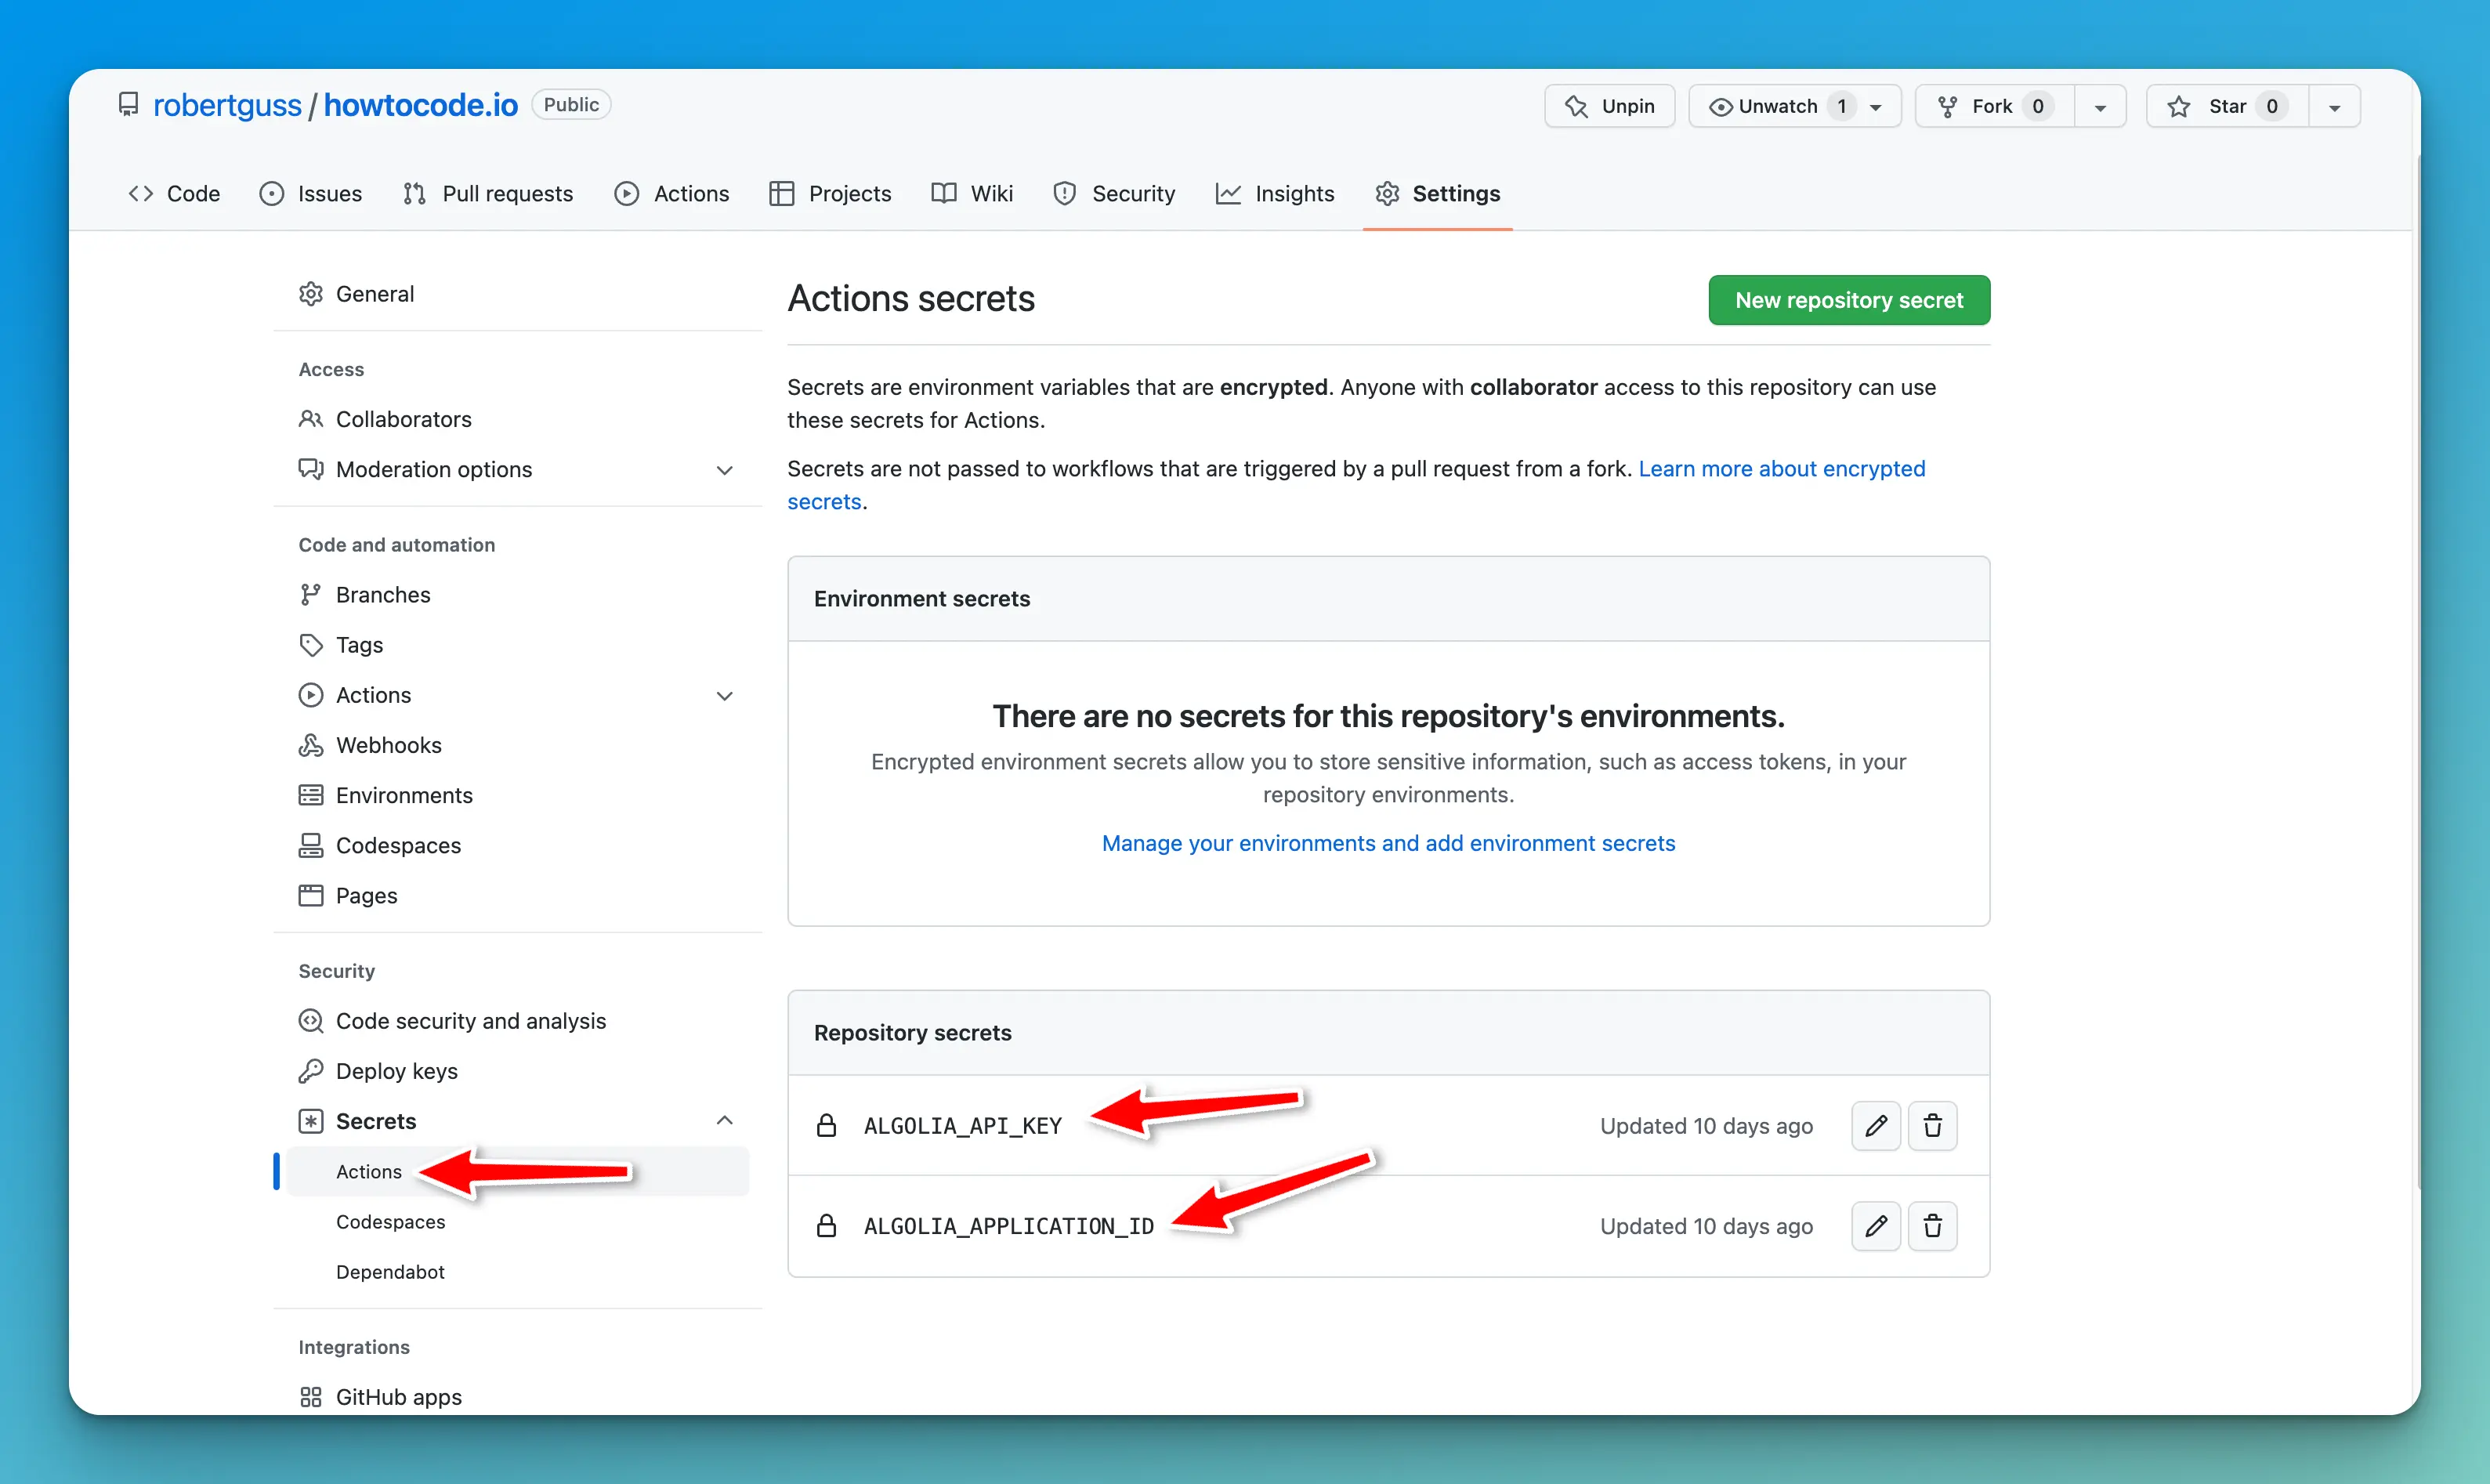
You will need to place your ALGOLIA_API_KEY and ALGOLIA_APPLICATION_ID as secrets within your GitHub repo so that this GitHub action has access to them. If you are unsure how to do that, here are the docs.
You also do not have to set this up as a cron job. You can trigger this GitHub action however you like. Here are the docs on the various ways to trigger GitHub actions.
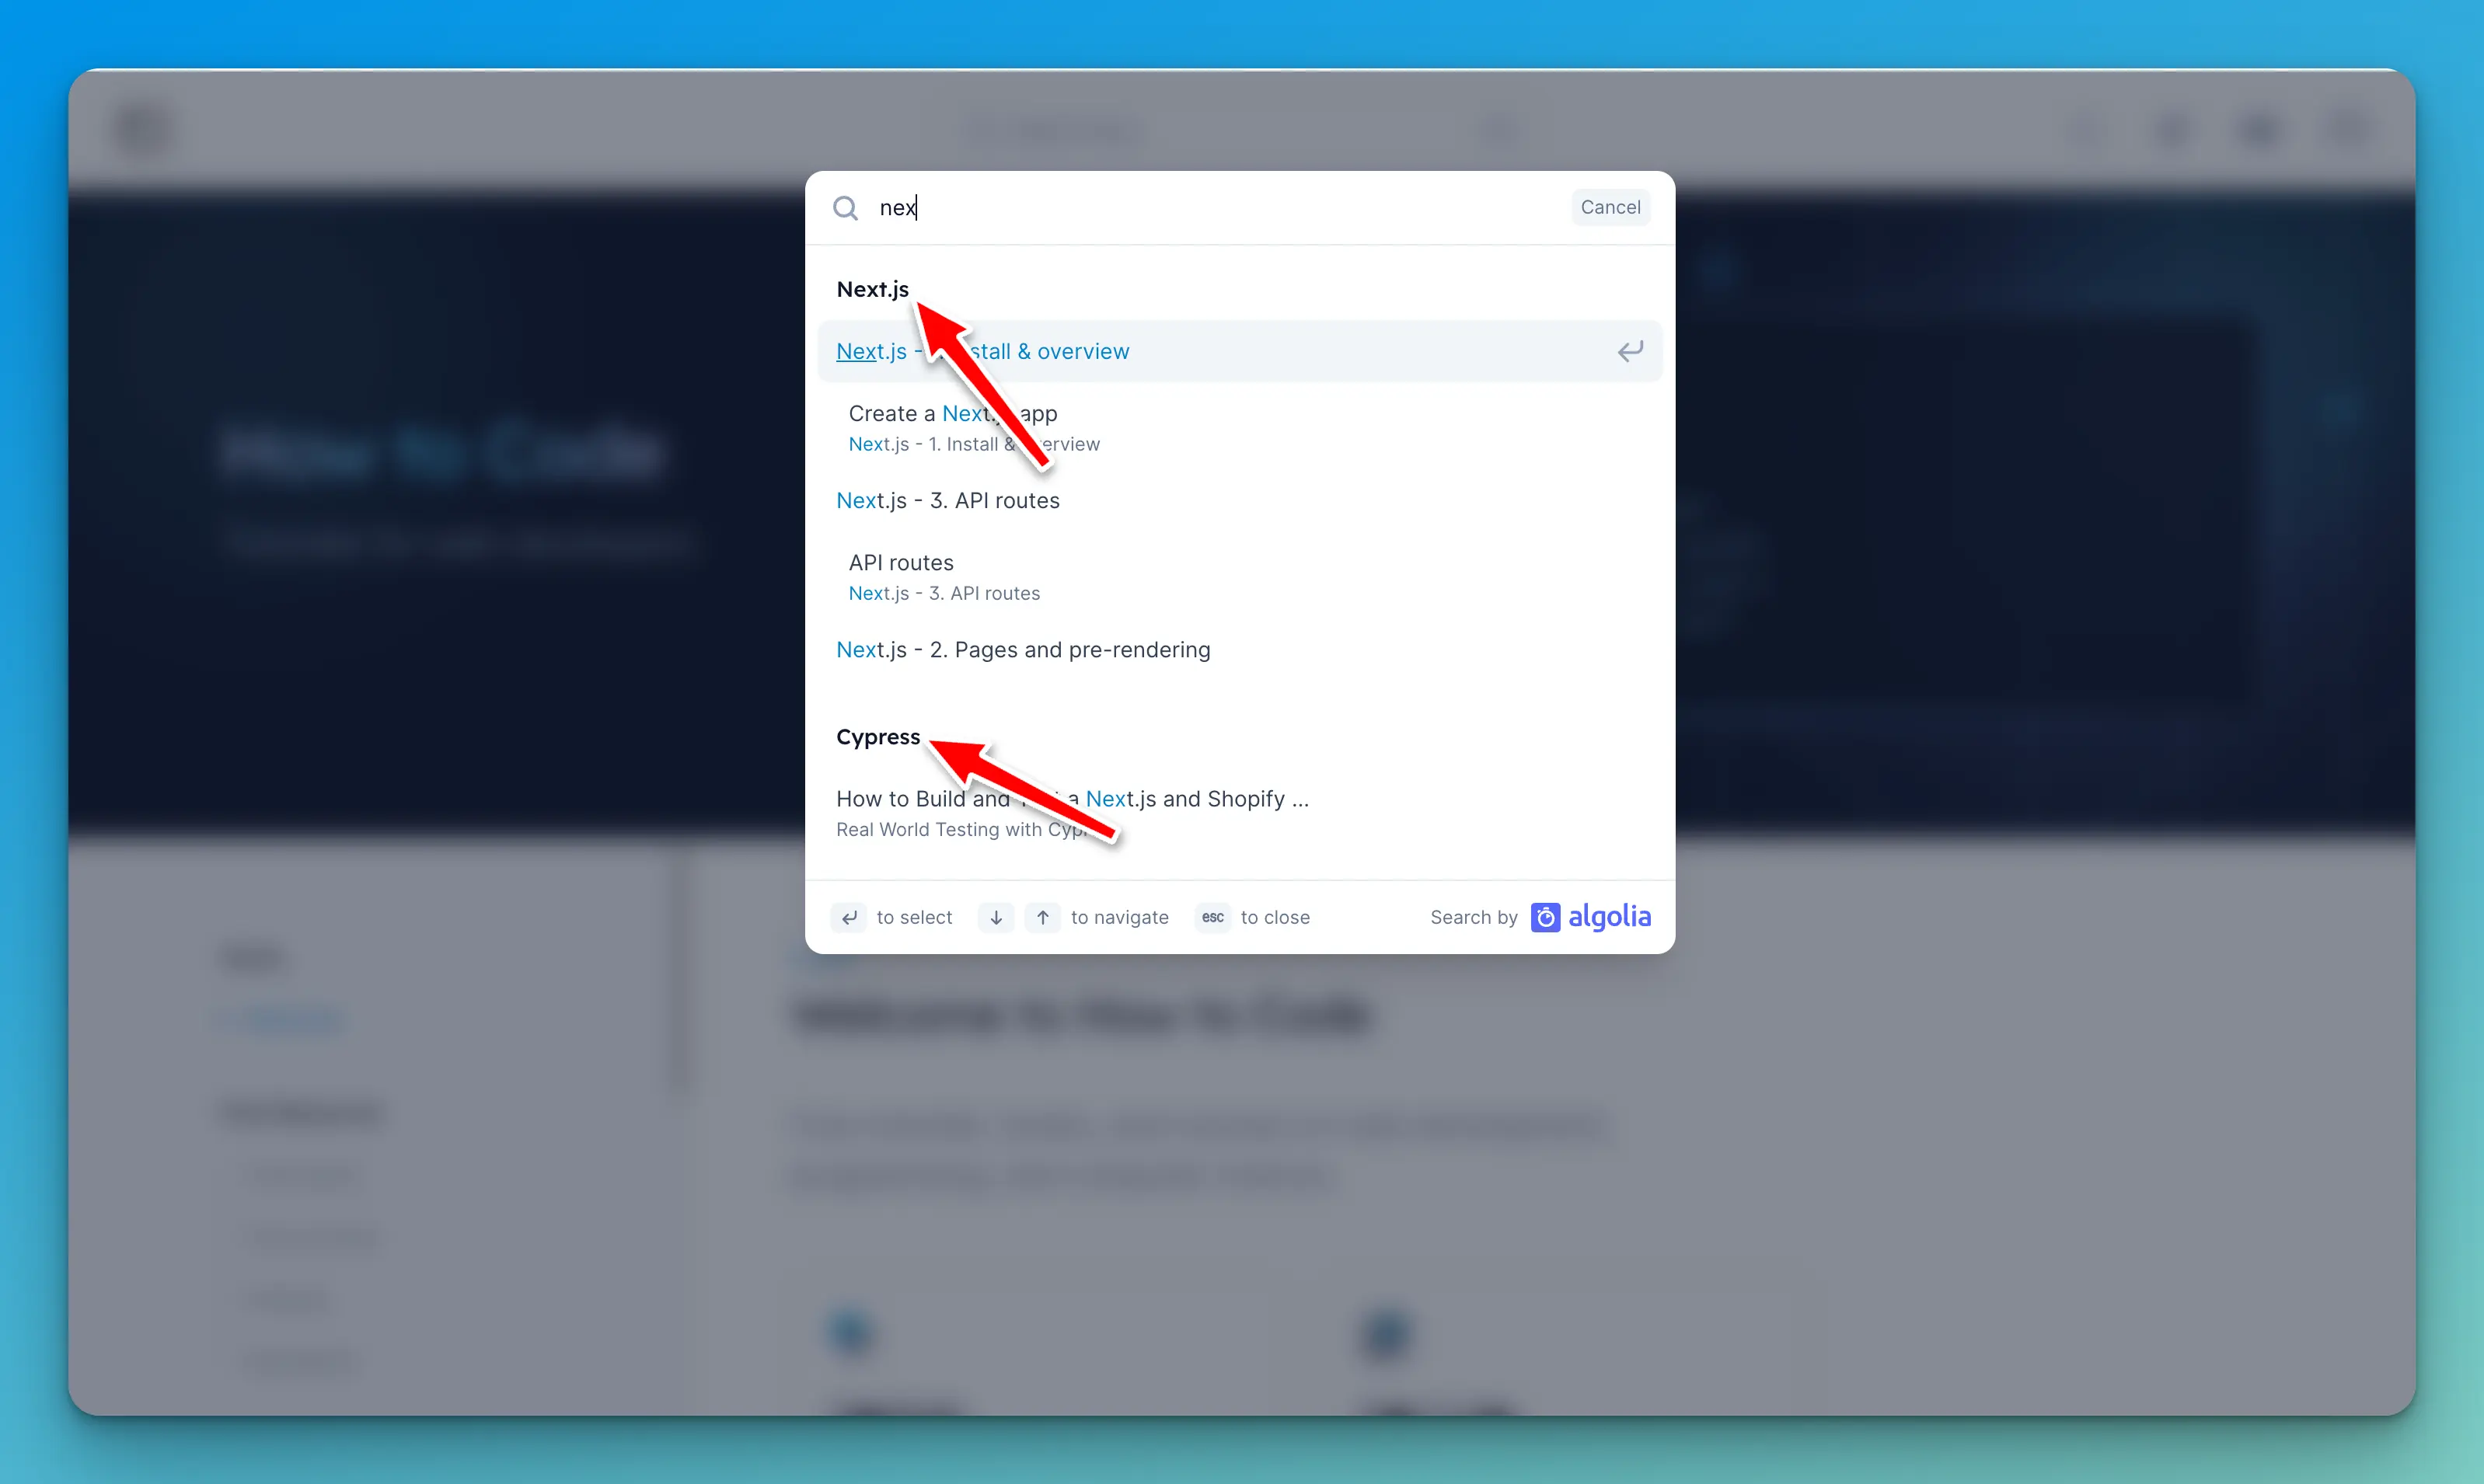
UI
You will need a UI for your DocSearch results for your site. My site is built with Next.js, so I am using the DocSearch react component provided by Algolia. You do not need to be using React, however. You can read their docs on how to set up the UI here.
Conclusion
In this article, you learned how to manually set up and configure Algolia DocSearch using their custom Docker image. Then you learned how to create a GitHub action that will crawl your site automatically.