Jamstack
Jamstack membership site with Eleventy & Memberstack
Updated:
For this project, we are going to be building a membership site using the Eleventy static site generator and Memberstack. We will then deploy our membership site with Surge.
Installing Eleventy
First, you will need to download the course repo and use the start/ folder located within Eleventy-Membership. This repo contains the theme for our site, which will allow us to hit the ground running. Memberstack provided the theme as just a .zip of HTML, CSS, and js files. I then took all of those files and integrated them with Eleventy to make our lives easier and so that you can become familiar with another static site generator.
Open your terminal inside of the start/ folder and install the npm packages.
npm i
Then start the eleventy server to serve up our site.
npm start
The terminal should display various URLs to access the site.
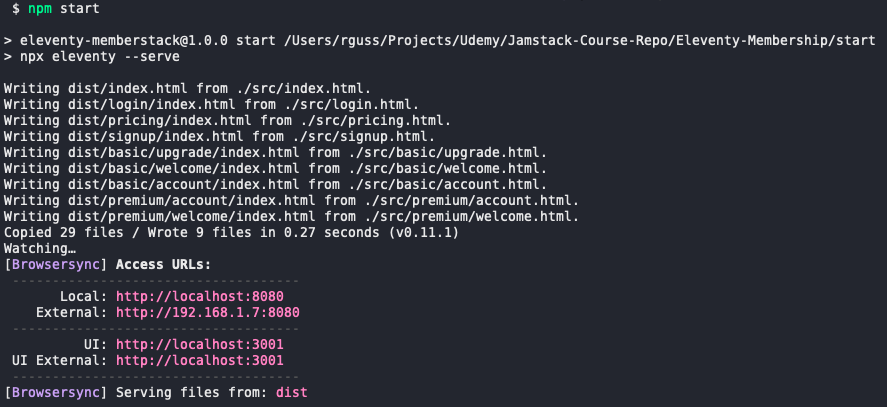
I like to use http://localhost:8080/, which is the "Local" URL.
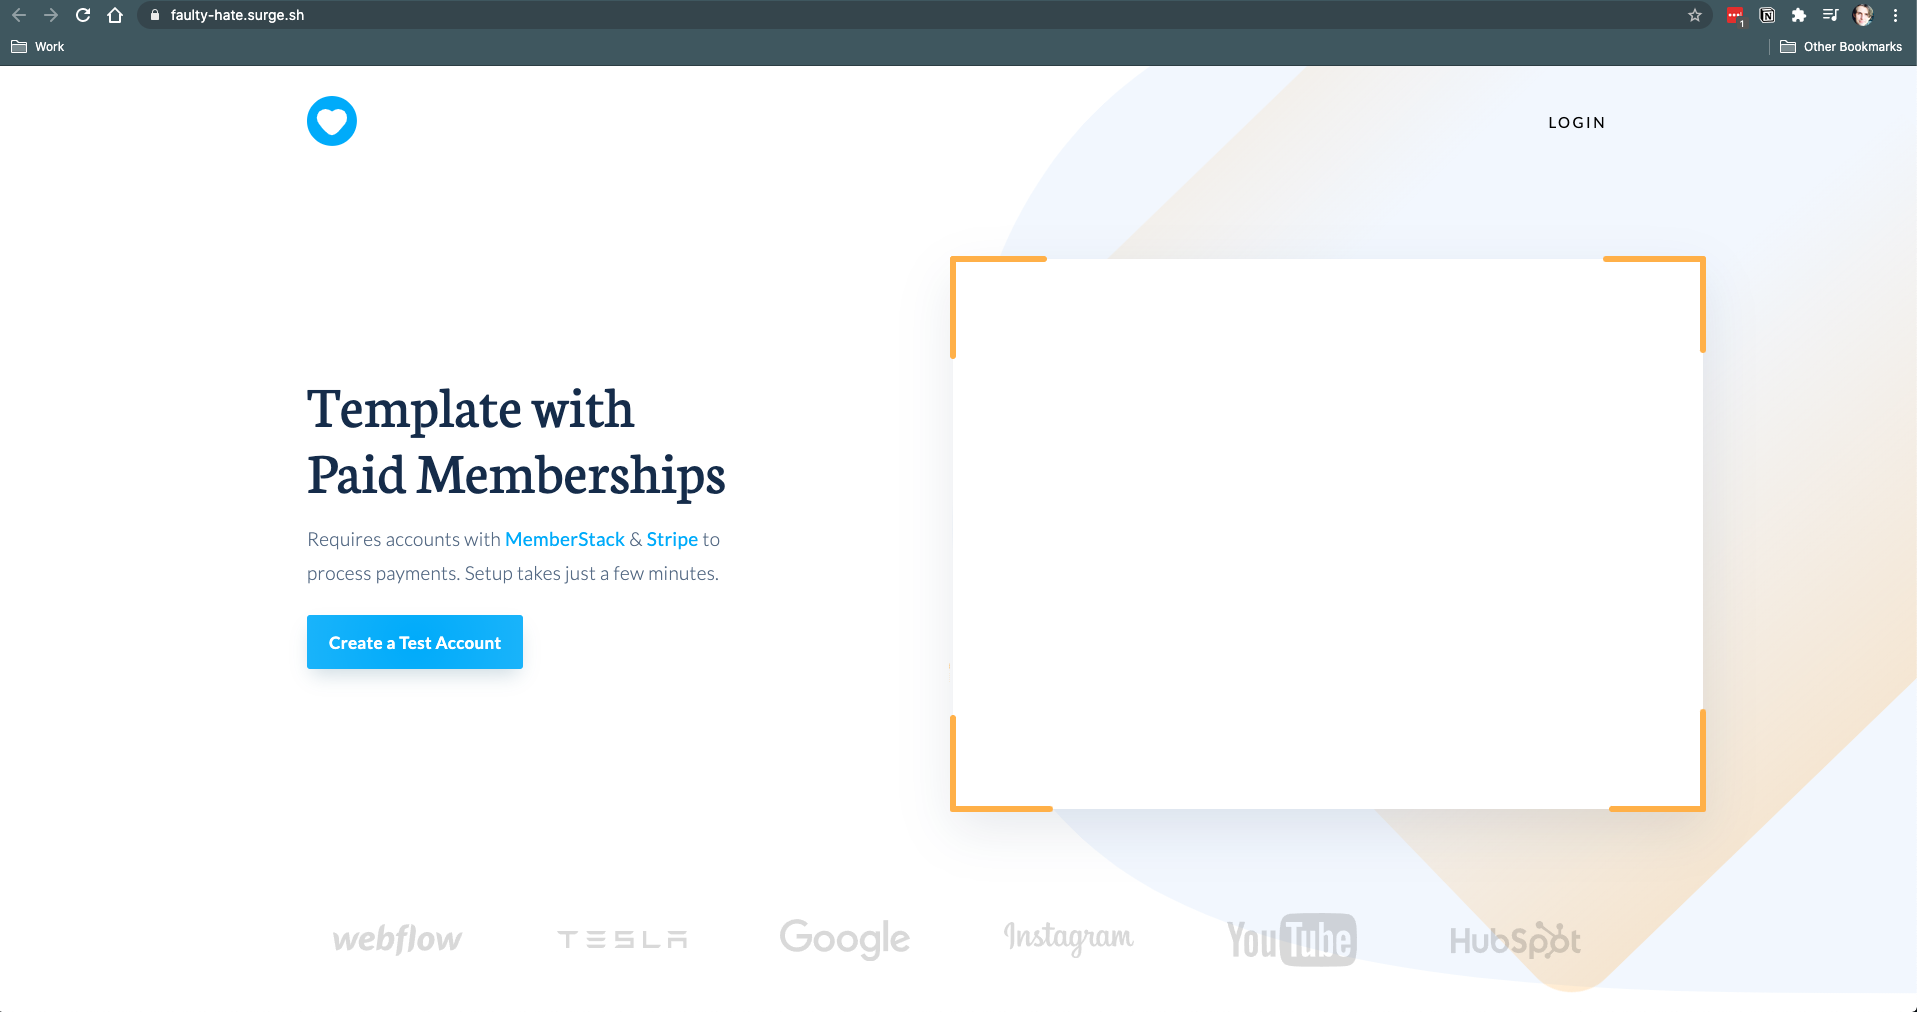
When you open the URL in your browser, you should see a site that looks like this.

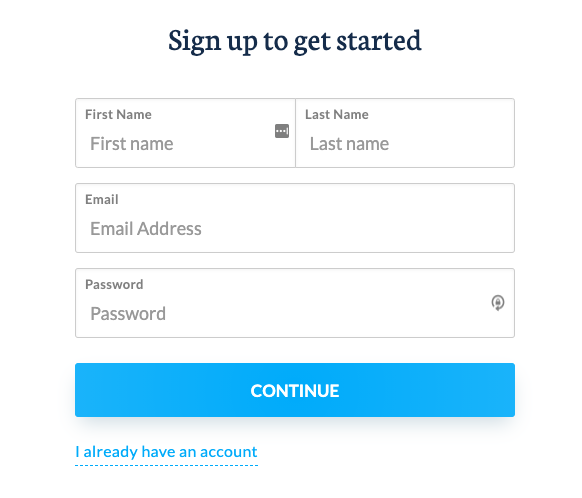
It is a relatively simple site with some placeholder content and two pricing tables at the very bottom. Take a couple of mins to click around on the navigation links to see what the pages look like. There is a login form, a signup form, and two membership areas.
We will be using Memberstack for handling our user login, authentication, sessions, and payments. Memberstack will handle all of the backend, whereas we just have to provide the front-end content for our members.
Integrating Memberstack
Before we can begin using Memberstack, you need to sign up for a free account. Once you have signed up and log in, you will see the following screen.
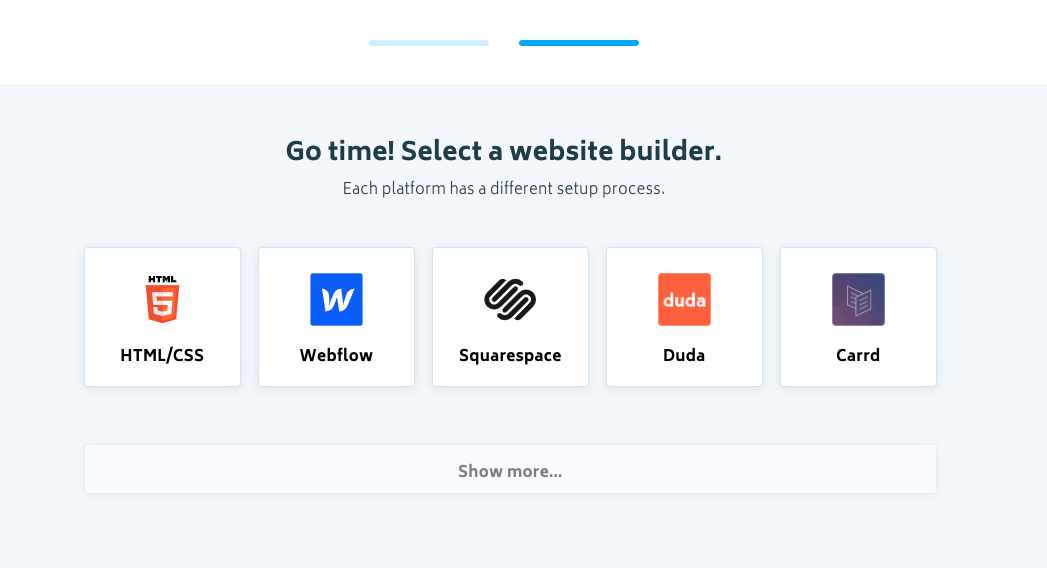
Choose "HTML/CSS"
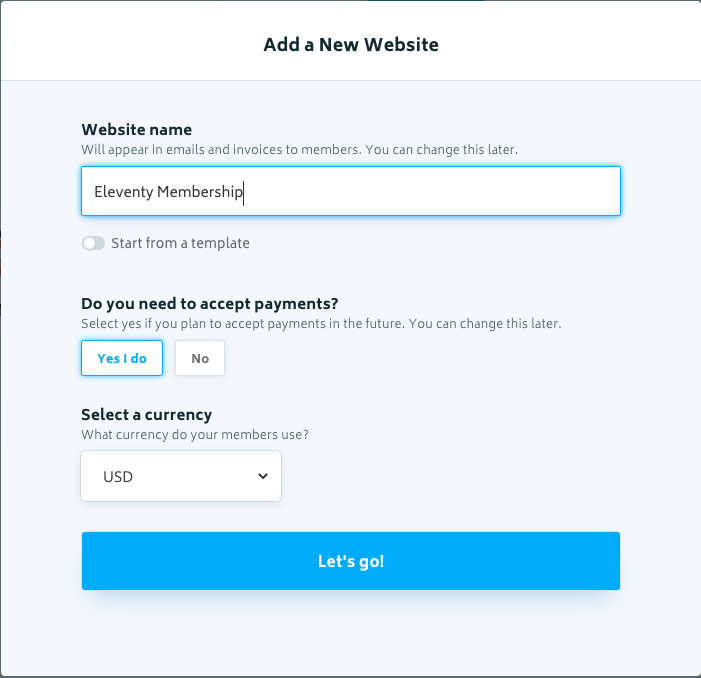
On the next screen, give your site a name. I called my "Eleventy Membership," but you can name it whatever you would like. Also, make sure to select the need to accept payments as we will be integrating with Stripe later. Then click the "Let's go!" button.
You will land on your membership dashboard for our site.
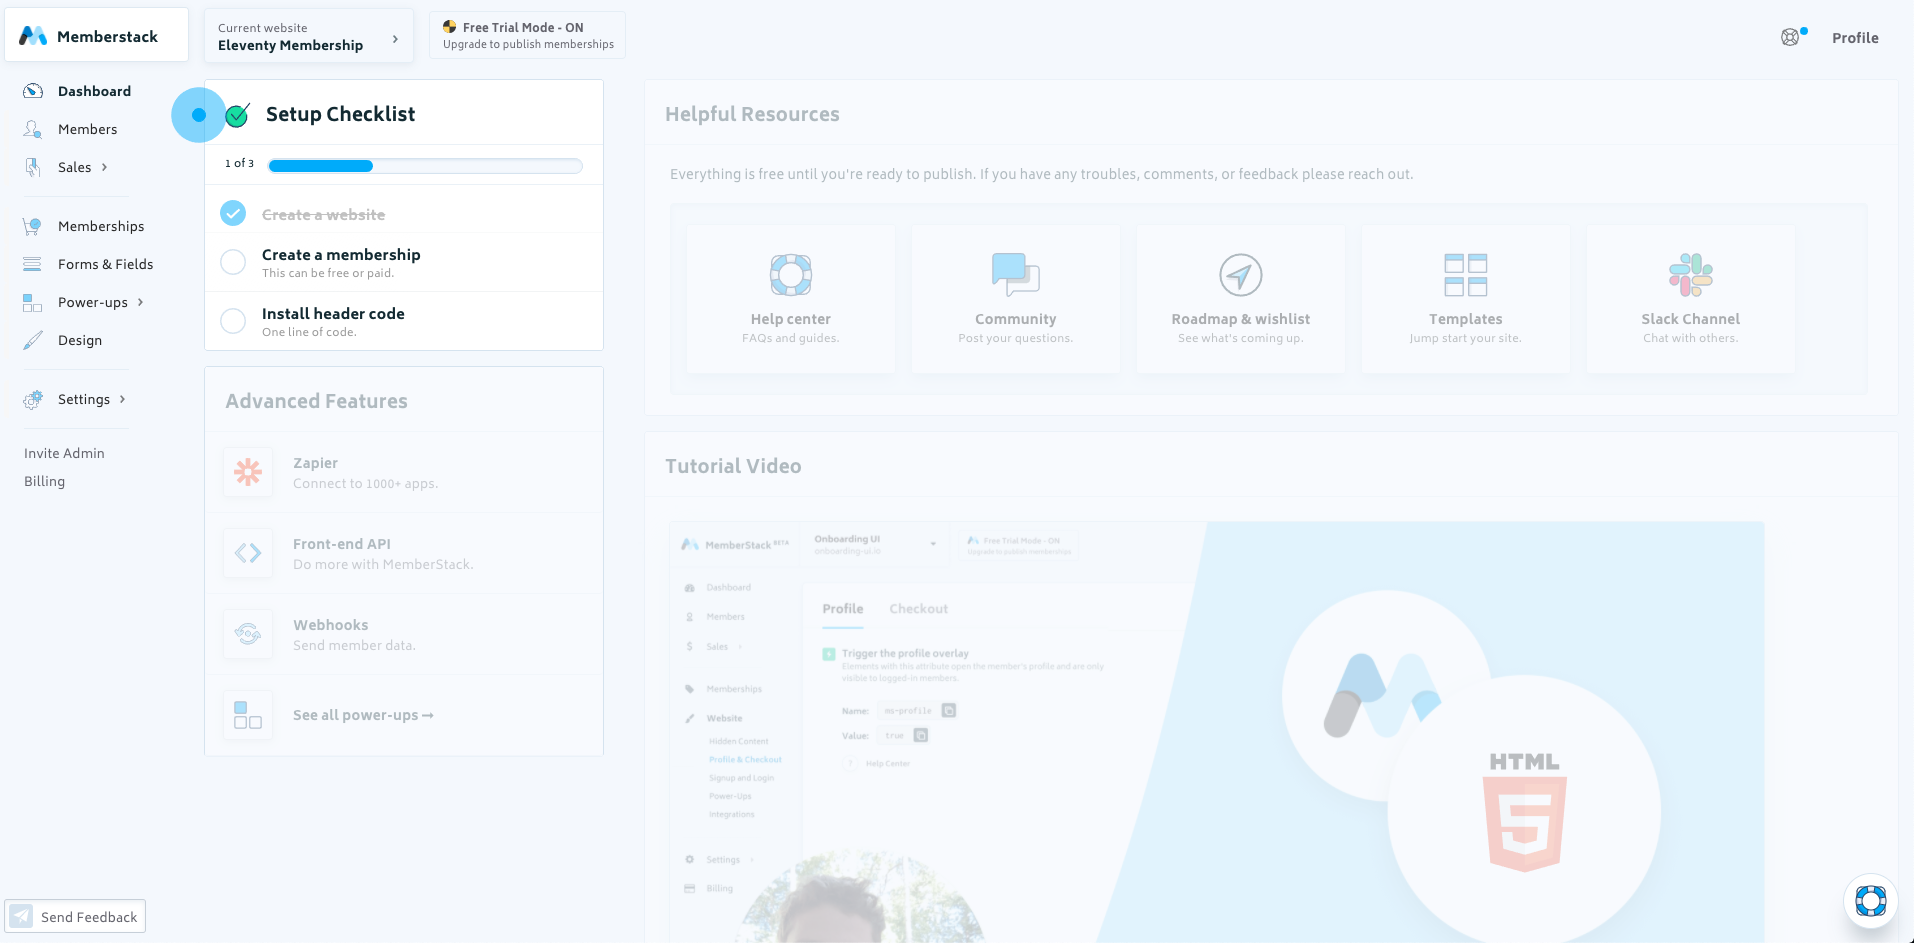
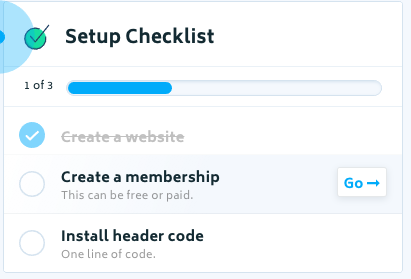
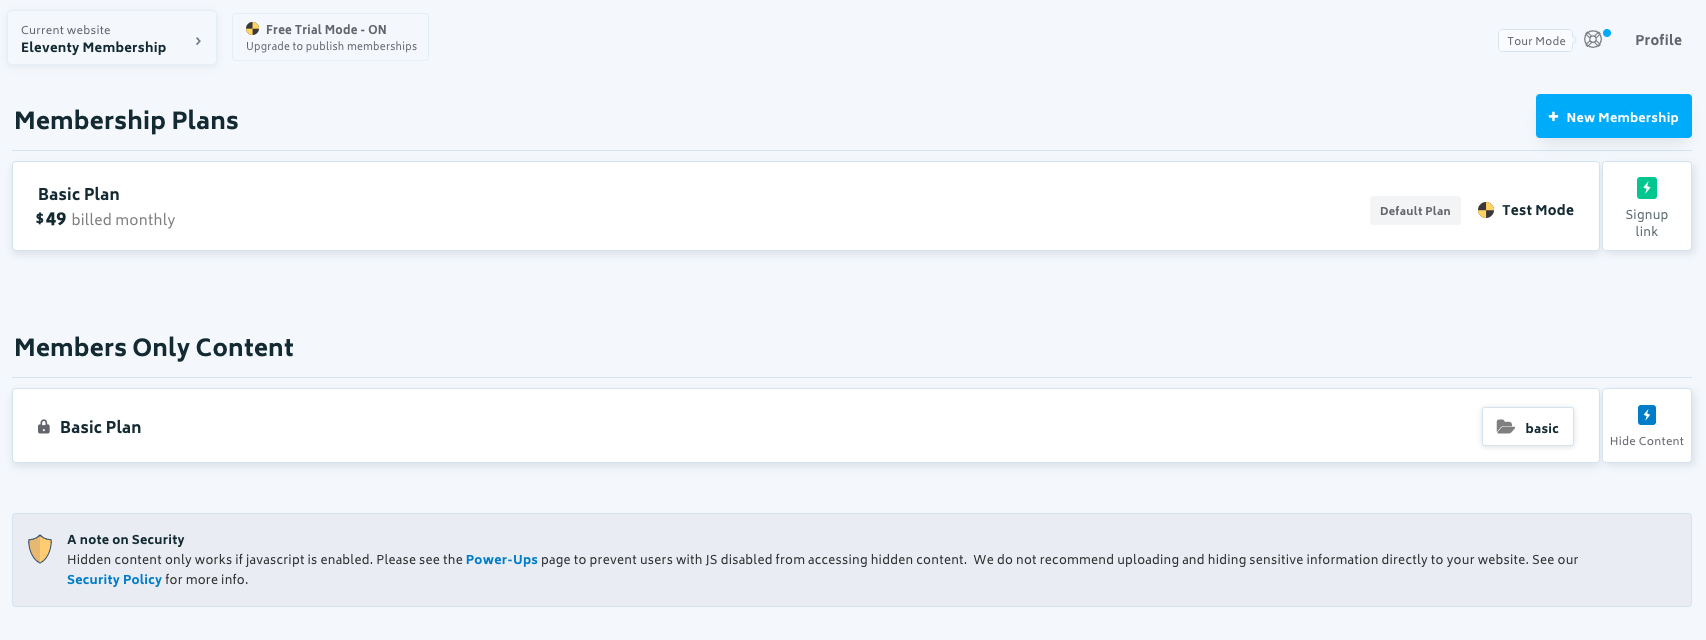
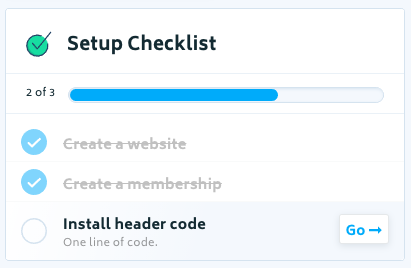
Memberstack gives us a checklist we need to follow to set up our new site. Click on the "Create a membership" button on the Setup Checklist.
On the next screen, click on the "New Membership" button. Here is where we will set up our two memberships, "basic" & "premium". Let's start with the basic plan first.
Basic Membership
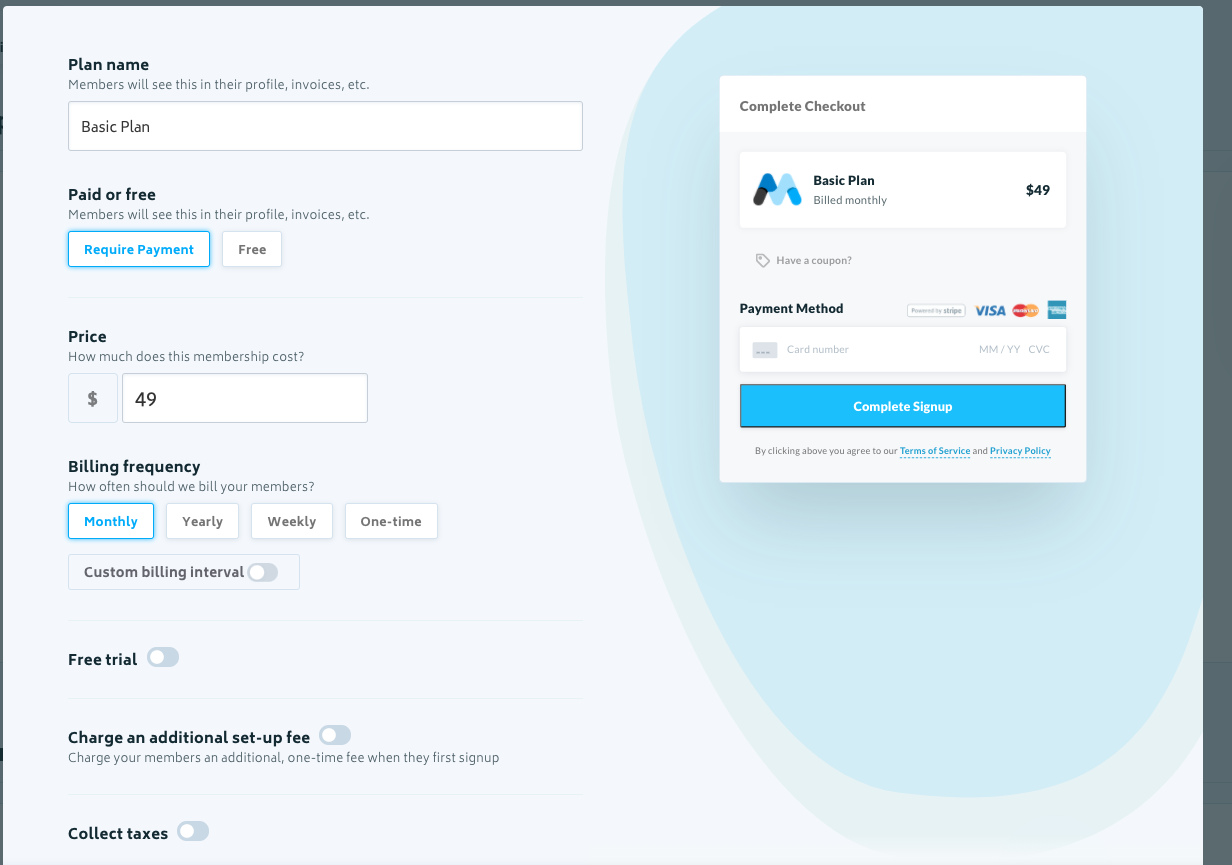
- Enter "Basic Plan" for the plan name.
- Select the "Require Payment" button.
- Enter $49 for the price. This is the price listed on the pricing tables of our site.
- Select "Monthly" for the billing frequency
- Free Trial, Setup Fee & Collect taxes can remain off for now.
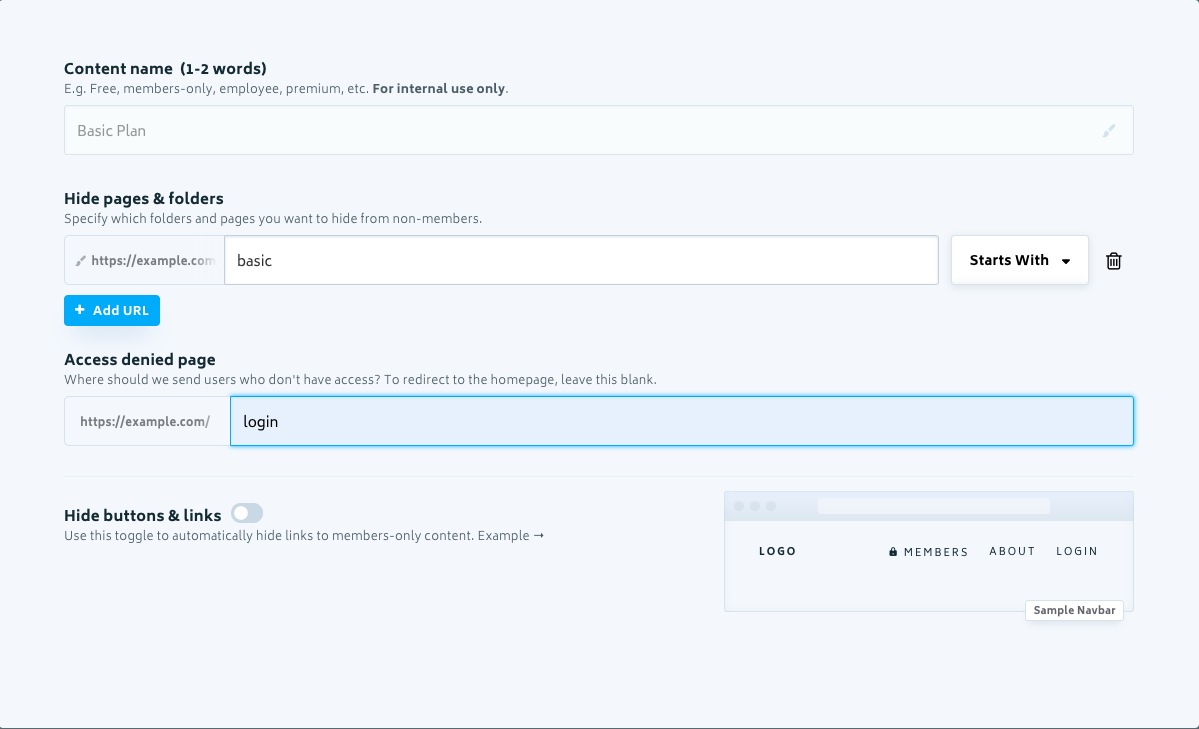
Now click on the "Hide Content" button in the "Members-only content" section. This section will make sure that users who do not have access to either membership plan cannot access the content.
- Enter "Basic Plan" for the content name.
- Enter
basicfor the "Hide pages & folders" field. This will hide all of the basic plan content from users who do not have a basic plan. - Enter
loginfor the "Access denied page." This will redirect users who try to access the basic account page who are not logged in or are not paying subscribers. - Click the "Create" button at the bottom.
For the "Page after signup" & "Page after login" enter basic/account/
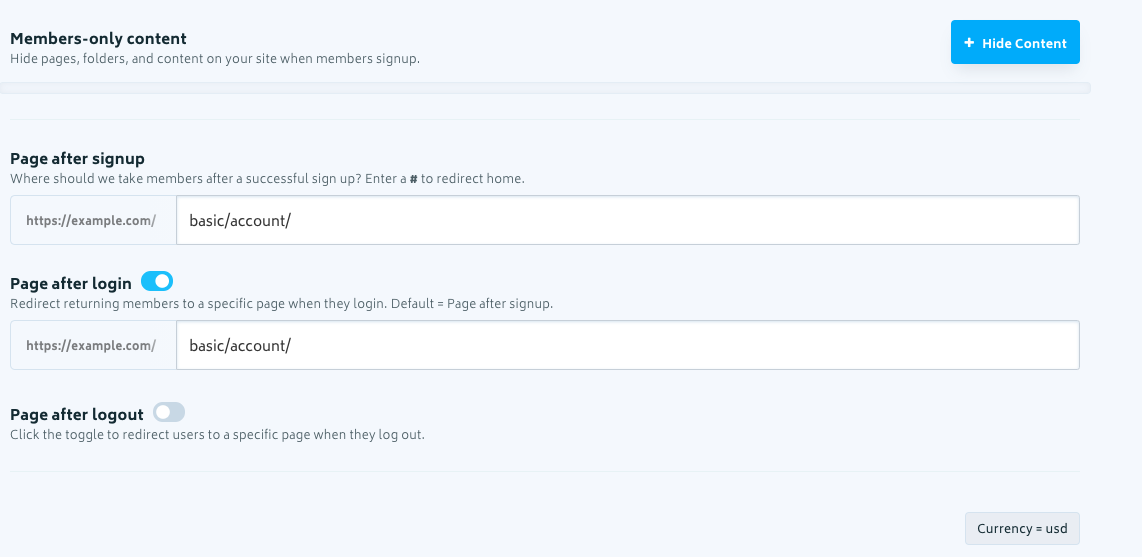
Memberstack will redirect any user who has a "basic plan" membership to the basic account page after signing up and each time they log in.
Then click the "Create Membership" button.
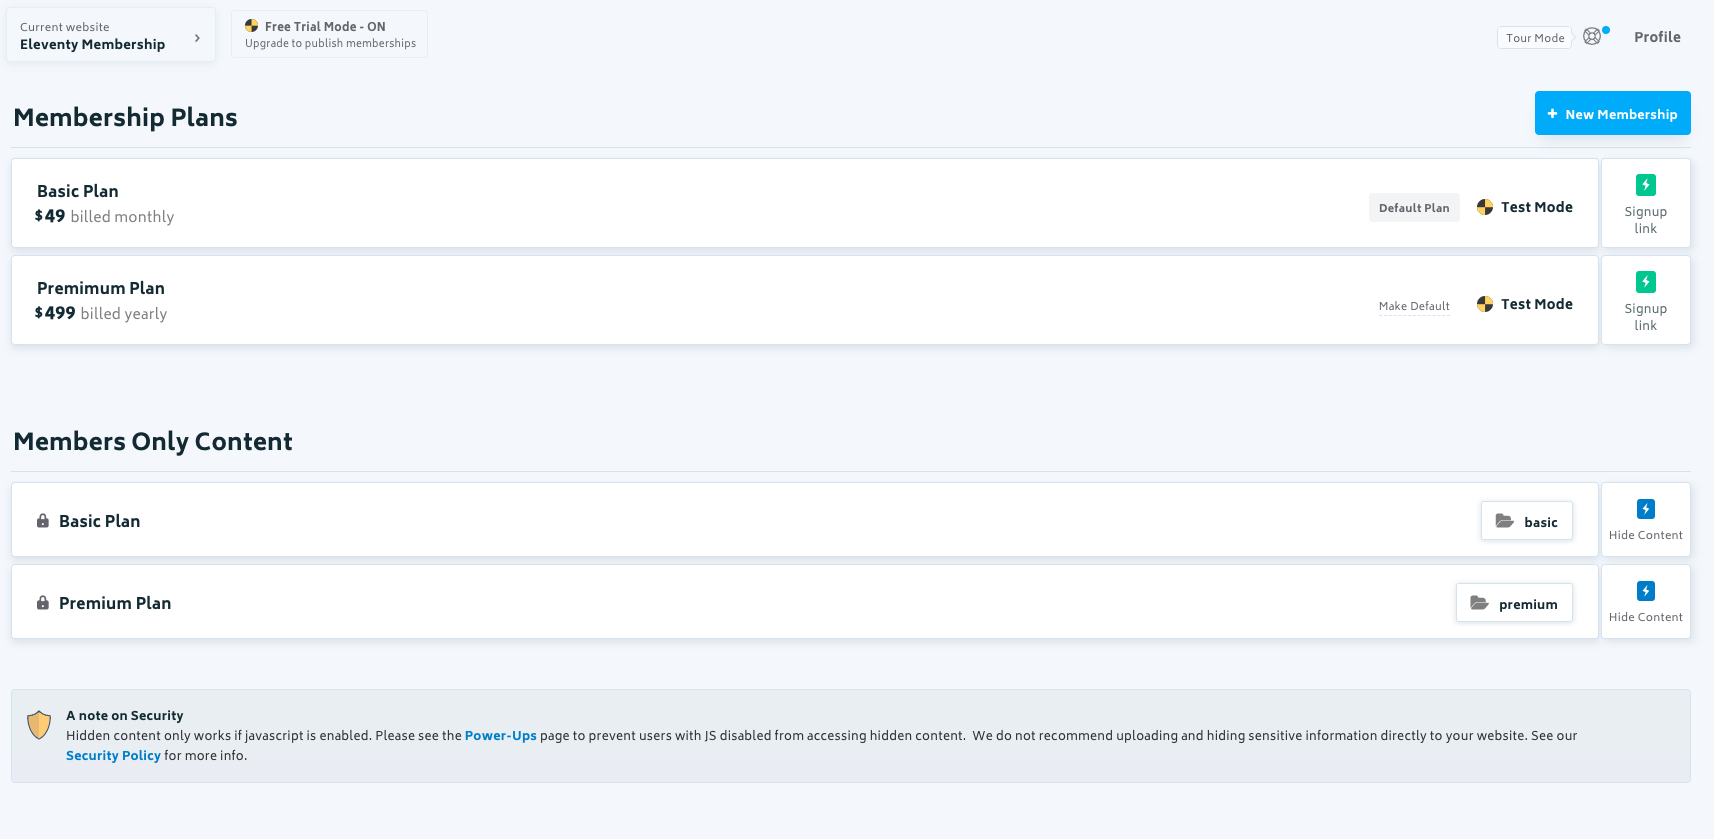
Your Membership dashboard should now look like this.
Premium Membership
Click on the "New Membership" button.
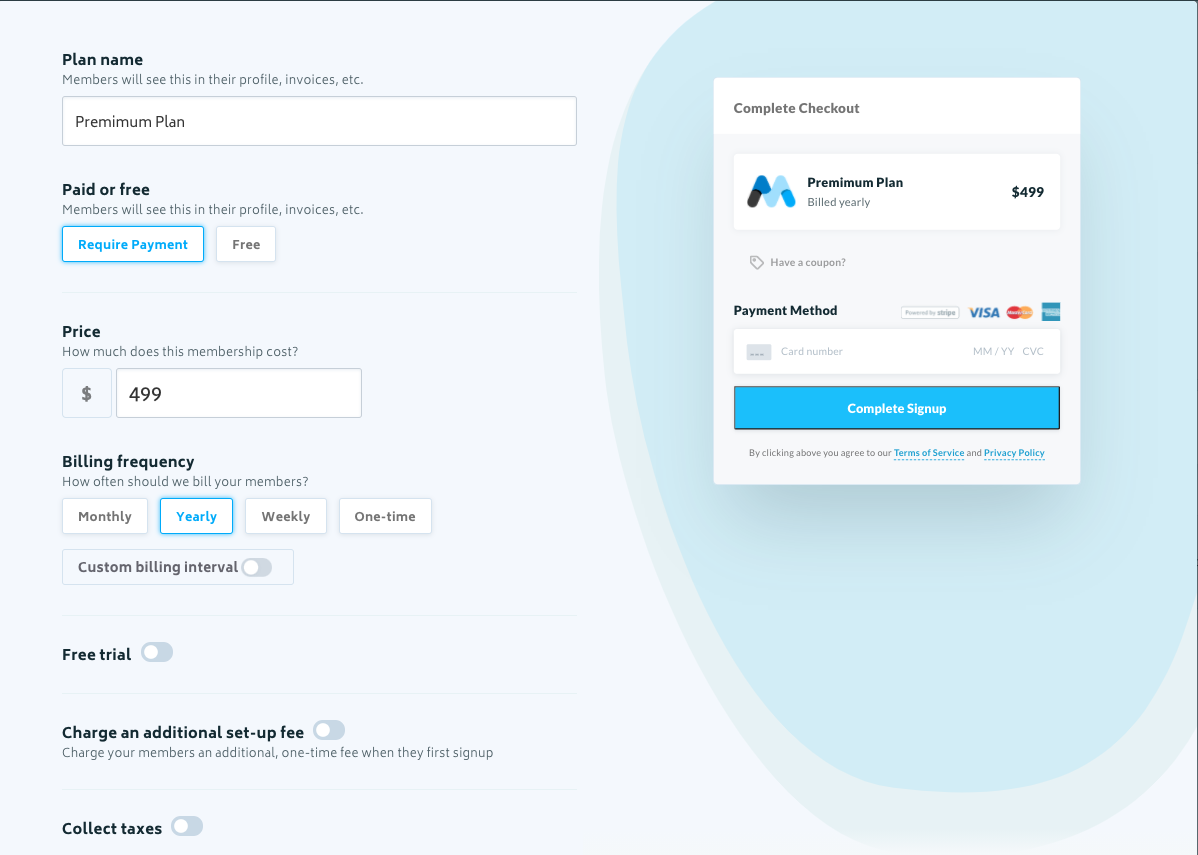
- Enter "Premium Plan" for the plan name.
- Select the "Require Payment" button.
- Enter $499 for the price. This is the price listed on the pricing tables of our site.
- Select "Yearly" for the billing frequency
- Free Trial, Setup Fee & Collect taxes can remain off for now.
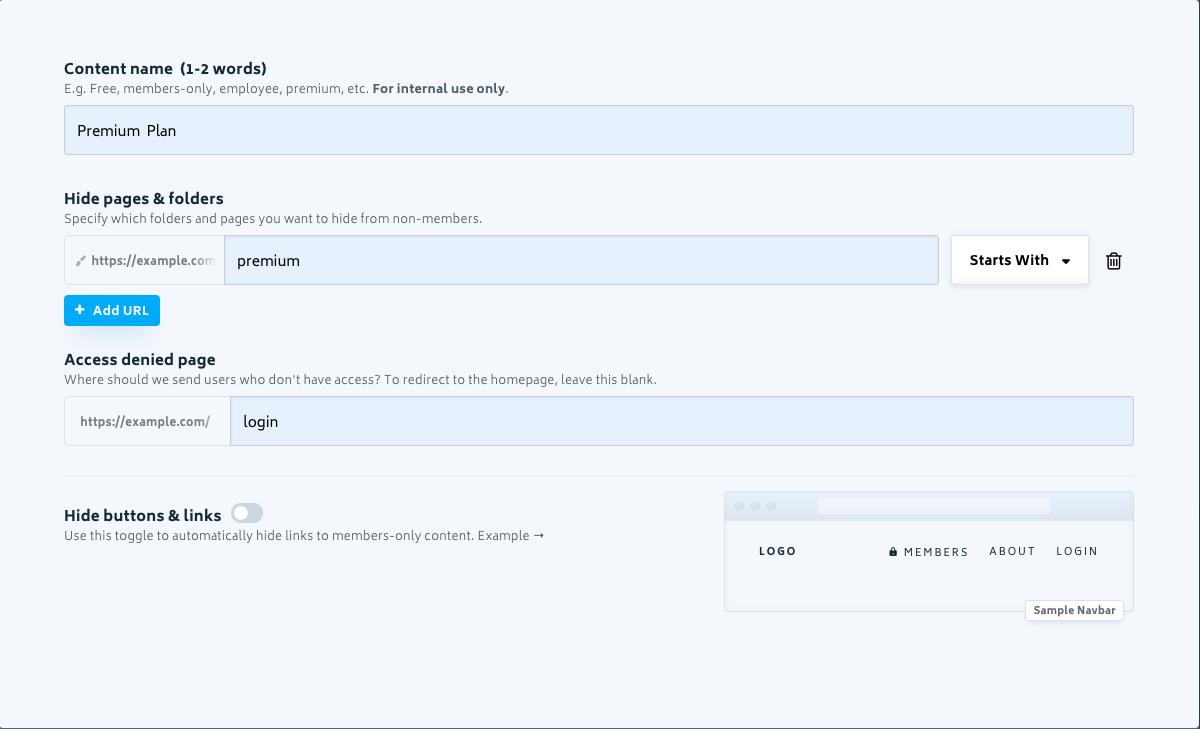
Now click on the "Hide Content" button in the "Members-only content" section. This section will make sure that users who do not have access to either membership plan cannot access the content.
- Enter "Premium Plan" for the content name.
- Enter
premiumfor the "Hide pages & folders" field. This will hide all of the premium plan content from users who do not have a premium plan. - Enter
loginfor the "Access denied page." This will redirect users who try to access the premium account page who are not logged in or are not paying subscribers. - Click the "Create" button at the bottom.
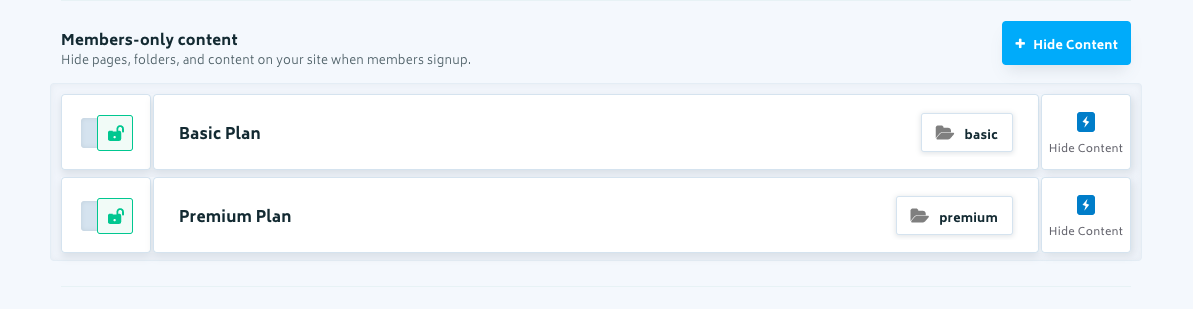
Make sure that both the "Basic Plan" & "Premium Plan" are on. Our premium members get access to both basic and premium content.
For the "Page after signup" & "Page after login" enter premium/account/
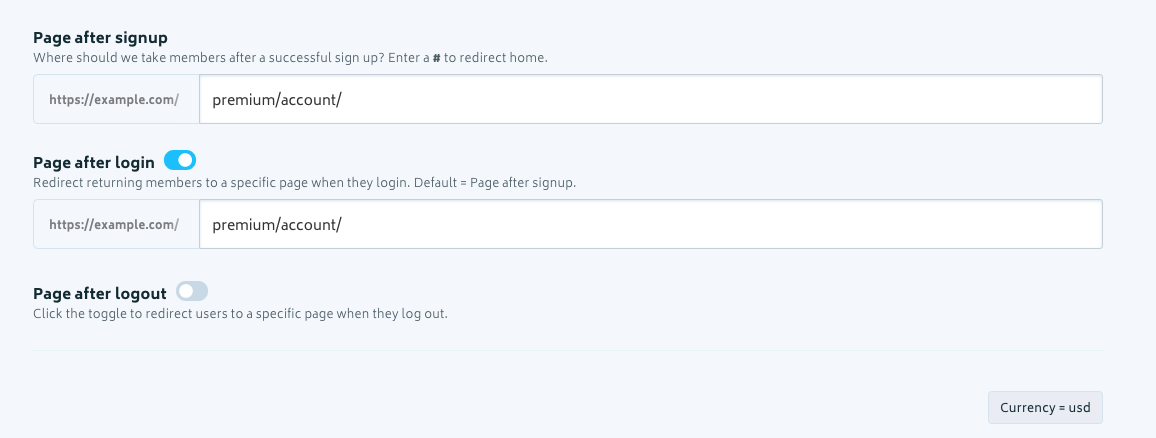
Memberstack will redirect the users who have a "premium plan" membership to the premium account page after signing up and after logging in.
Then click the "Create Membership" button.
Your Membership dashboard should now look like this.
Integrating Memberstack Memberships
Now that we have both of our memberships configured, we need to integrate them on our site so that our users can signup for them.
Underneath the "Membership Plans" section of our dashboard are both membership plans. To the right of those are buttons called "Signup link" this is the code snippet we need to link our memberships on our site to Memberstack. Click on the "Signup link" for the Basic plan first.
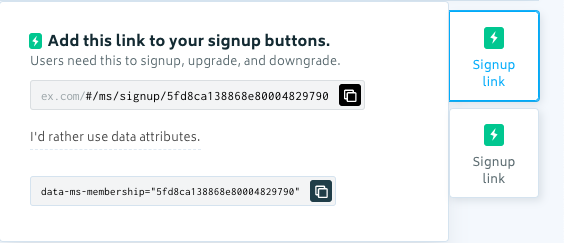
Then click the "I'd rather use data attributes" and copy the attribute.
Then head back over to our site's code and open the index.html file and scroll to around line 232 and add the the data attribute to our basic signup link like so:
<!--
<a
  data-ms-membership="5fd8ca13..."
  href="signup"
  class="button full-button w-inline-block"
>
  <div>Get Started</div>
</a>
-->
This code is commented out so that the <a> not be crawled on this page. You will need to add this code without the comments for it to work
Now let's do the same for our premium membership. Head back to Memberstack and copy the data attribute for the premium plan.
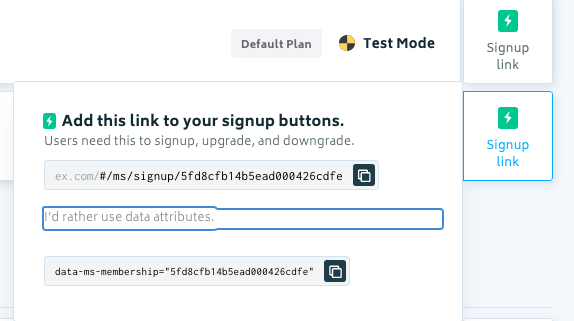
Add the data attribute to our premium link around line 247
<!--
<a
  data-ms-membership="5fd8cfb1..."
  href="signup"
  class="button full-button secondary-button w-inline-block"
>
  <div>Get Started</div>
</a>
-->
This code is commented out so that the <a> not be crawled on this page. You will need to add this code without the comments for it to work
Installing Memberstack Header code
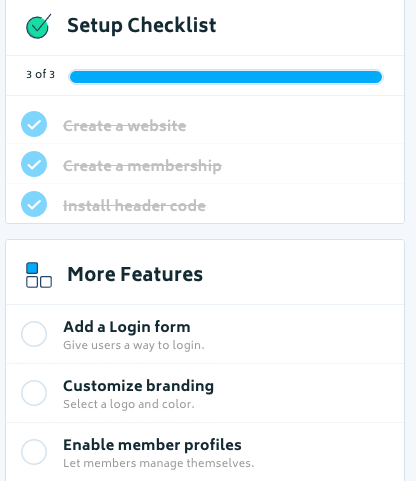
Next, we need to install the Memberstack <script> tag in the <head> of our site. Head back over to the main dashboard of Memberstack and click on the "Install header code" underneath the Setup Checklist.
Copy the code snippet in there and then paste the snippet just above the closing </head> tag in src/_includes/layouts/base.html. The file should now look like this:
<!-- Additional Code Above
<link
  href="/asssets/images/Freebie-Favicon.png"
  rel="shortcut icon" type="image/x-icon">

  <link
    href="/images/images/Freebie-Webclip.png"
    rel="apple-touch-icon">
-->

  <!-- Memberstack
  <script
    src="https://api.memberstack.io/static/memberstack.js?custom"
    data-memberstack-id="751ee1...">
  </script>
  -->
</head>
This code is commented out so that the <a> not be crawled on this page. You will need to add this code without the comments for it to work
Note: the formatting & indentation might be different in your file.
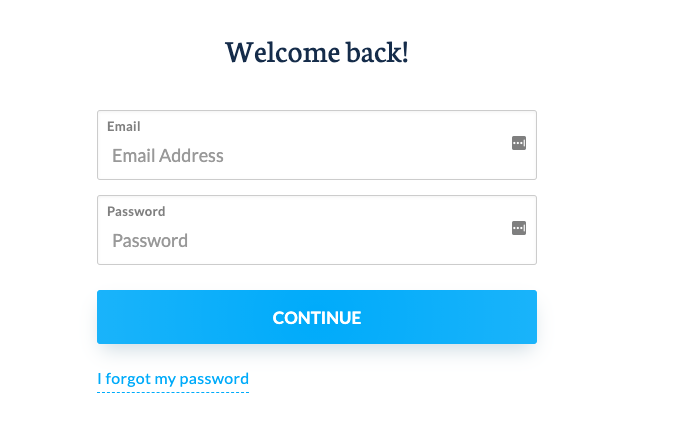
Signup Form
Next, we need to integrate Memberstack without Signup Form. On the Memberstack main dashboard, click on the "Add a Login form" under the "More Features" section.
You will be taken to the "Login" form section, but we need to set up the "Signup" form first. So click on the "Signup" tab at the top.
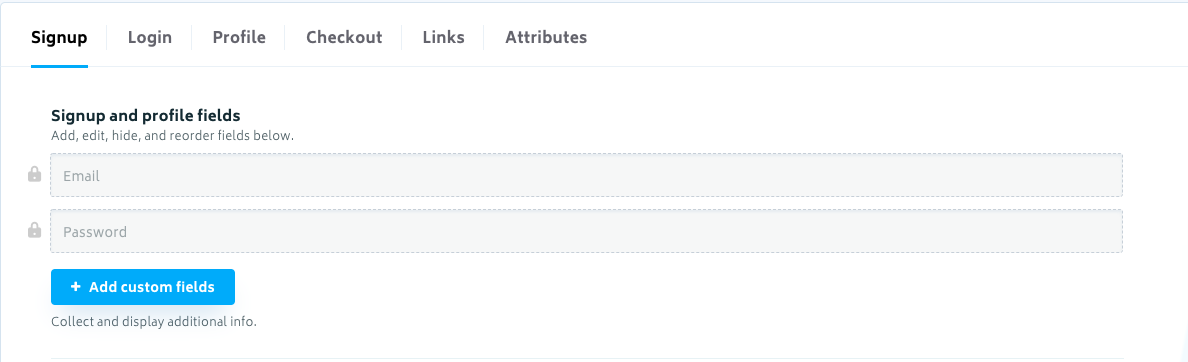
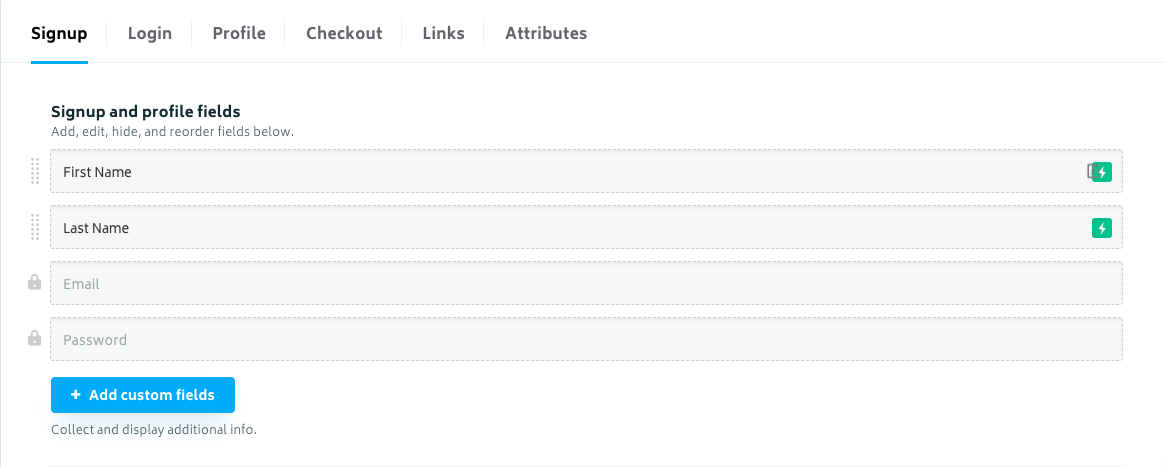
By default, the Signup form comes with fields for email and password. Our form also has a field for first name and last name.
Click on the "Add custom fields" button to add the First Name Field.
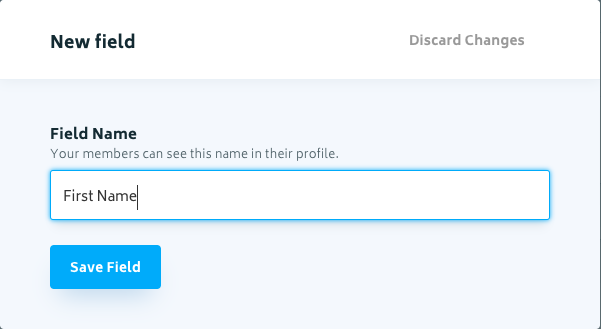
Add another field for the Last Name.
The signup form should now look like this:
Scroll to the bottom of the form under the "Signup form type" and select Build a custom signup form.
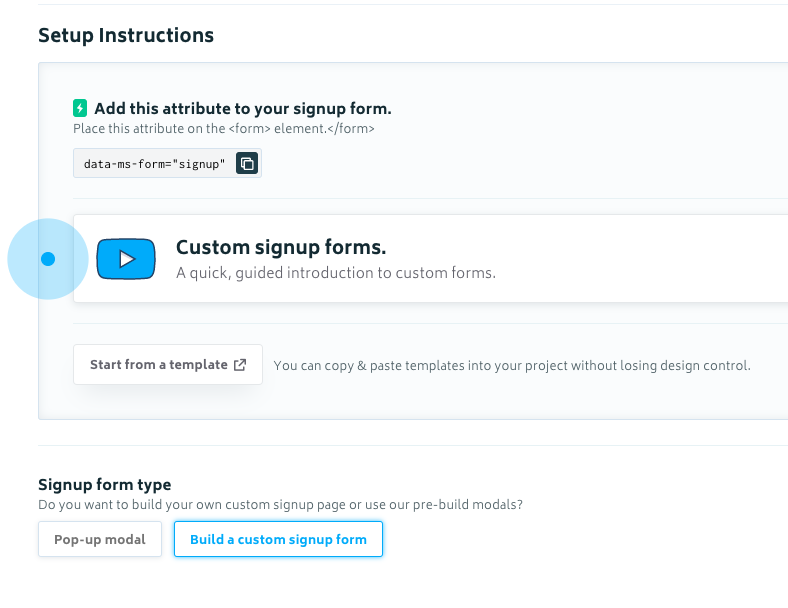
Copy the data attribute.

We now need to add this to the signup <form> element on our site. Add the data attribute to the form element in signup.html around line 12
<form
  data-ms-form="signup"
  id="sign-up"
  name="wf-form-Sign-up-Form"
  data-name="Sign up Form"
  method="post"
  ms-signup="true"
  class="login-form"
></form>
Login Form
Next, let's set up our login form.
Click on the "Login" tab at the top of the Memberstack Dashboard.
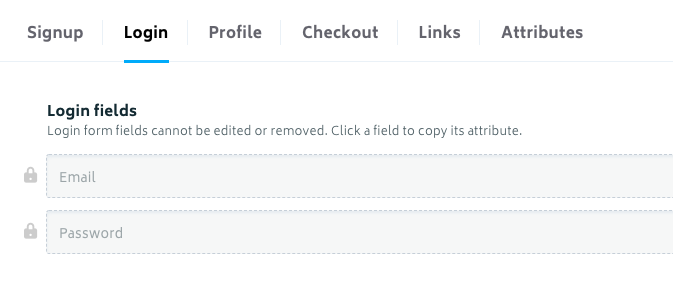
Our site's login form only has an email and password field, so the default fields that Memberstack provides are just what we need.
On the Memberstack dashboard, scroll to the bottom and select "Build a custom login form," just like we did for the signup form.

Then copy the data attribute and paste it into the <form> element of the login form around line 13 of login.html
<form
  data-ms-form="login"
  id="login"
  name="wf-form-login"
  data-name="login"
  method="post"
  ms-login="true"
  class="login-form"
></form>
Deploying to Surge
Now that we have our site set up with Memberstack, we need to deploy it to a live URL for testing. We will be deploying with Surge.
First, we need to install Surge as a global NPM package.
npm i -g surge
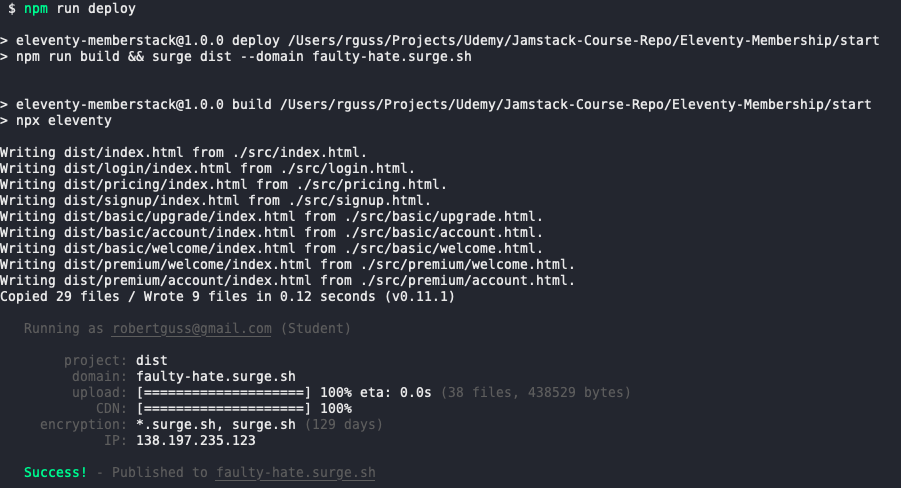
Next, we need to build our static site.
npm run build
Next, we can deploy our site with this simple command.
surge dist
This tells Surge to deploy our dist folder, which contains our built static site.
If this is the first time you are using Surge, you will be asked to create an account. After doing so, you should see something similar to this.
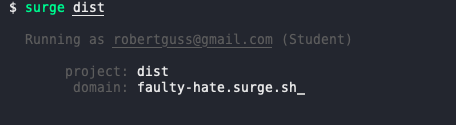
Press enter, and in a few seconds, your site will be live. Head on over to the domain surge provides and open it in your browser.
Copy the domain that Surge gives you and paste it into the deploy script within package.json like so:
{
  "name": "eleventy-memberstack",
  "version": "1.0.0",
  "description": "",
  "main": "index.js",
  "scripts": {
    "start": "npx eleventy --serve",
    "build": "npx eleventy",
    "deploy": "npm run build && surge dist --domain faulty-hate.surge.sh"
  },
  "keywords": [],
  "author": "",
  "license": "ISC",
  "devDependencies": {
    "@11ty/eleventy": "^0.11.1"
  }
}
This is a custom script I wrote that will automatically build our eleventy site and deploy to Surge whenever we run.
npm run deploy
After you have updated the script with your surge URL, run the deploy command to ensure everything is working correctly.
Testing Memberstack Integration
Now that our site is live let's test to ensure Memberstack is working correctly.
First, let's try to access the /basic/account page, which is reserved only for users who have a basic membership. On your live surge site, go to https://faulty-hate.surge.sh/basic/account, replacing the domain with whichever one Surge provided you.
You will be redirected to the login page.
Now try to access the premium account by going to /premium/account/. For example, https://faulty-hate.surge.sh/premium/account/.
You will be redirected to the login page.
Basic Membership Signup
Now let's try to signup for a basic plan. Scroll to the bottom of the home page to the pricing tables and click on the basic plan. Fill out the signup form and press "Continue." You should be prompted with a modal like this:
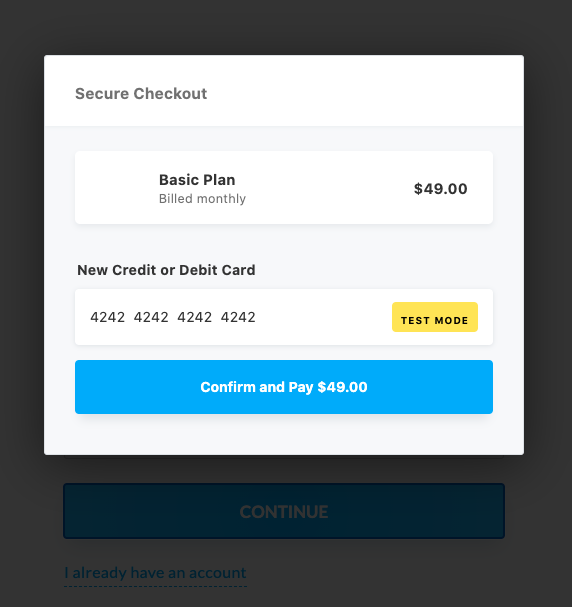
Click confirm and pay.
After a few seconds, you will be redirected to /basic/account, the basic account membership area. So far, so good! Memberstack handles all of the session and authentication for us, so we are currently logged in as a basic member.
Now that we are logged in, try to go to /premium/account, and you should be redirected to the login page.
So our basic memberships are working, and these members are unable to access the premium section of our site. Awesome!
Logging out
Now that we are signed in, we need a way for our users to sign out. We need to add a logout button to the nav of our /basic/account page right next to the "Change Plan" button.
Add the following to src/basic/account.html <nav> tag.
<a href="#/ms/logout" class="button navbar-cta w-nav-link">Log Out</a>
The entire <nav> should look like this.
<nav role="navigation" class="homepage-nav-menu w-nav-menu">
  <a href="#/ms/logout" class="button navbar-cta w-nav-link">Log Out</a>
  <a href="/basic/upgrade" class="button navbar-cta w-nav-link">Change Plan</a>
</nav>
The entire account.html file should look like this.
<div
data-collapse="medium"
data-animation="default"
data-duration="400"
class="navbar w-nav"
>
<a href="/" class="brand w-nav-brand">
<img src="/images/images/heart.svg" alt="" />
</a>
<nav role="navigation" class="homepage-nav-menu w-nav-menu">
<a href="#/ms/logout" class="button navbar-cta w-nav-link">Log Out</a>
<a href="/basic/upgrade" class="button navbar-cta w-nav-link"
>Change Plan</a
>
</nav>
<div class="menu-button w-nav-button">
<div class="w-icon-nav-menu"></div>
</div>
</div>
<div class="delete-me-section">
<h1 class="account-h1">Basic Account</h1>
<div class="w-richtext">
<p>Member's only areas can be any combination of the following:</p>
<ul>
<li>an individual page</li>
<li>a group of pages</li>
<li>folders</li>
<li>CMS items</li>
<li>or entire CMS collections</li>
</ul>
</div>
</div>
With that in place, let's push our latest changes to Surge and test.
npm run deploy
You should still be logged in, so navigate to /basic/account and you should see our new "Log Out" button at the top. When you click it, you should be redirected to the home page. Try to access /basic/account again, and you will be redirected to the home page.
Premium Membership Signup
Now that we have confirmed our basic membership is working, let's test out the premium membership.
On the home page, scroll to the pricing tables at the bottom and click on the premium membership. Fill out the form, and you will see the Premium payment form.
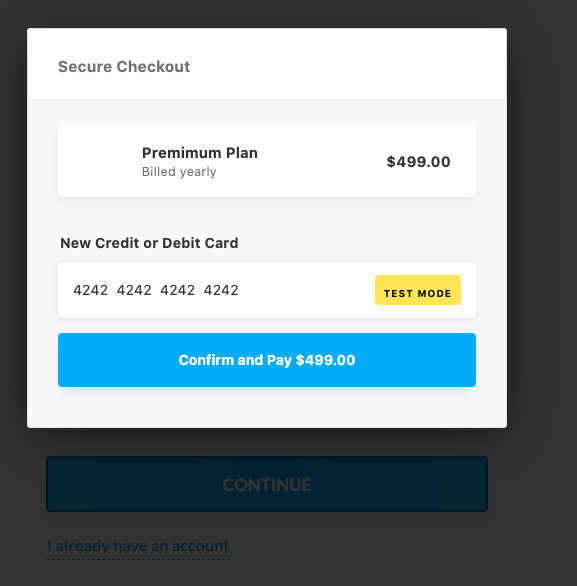
You should be redirected to the /premium/account page. Since premium also included access to everything the basic membership has, you should also be able to access /basic/account.
This page will also need a log out button, but you already know how to do that. If you want one on this page as well, by all means, go for it.
Connecting Stripe for payments
This next section is optional and is only useful if you are launching a live membership site. Currently, there is no way to test payments taken from Memberstack with Stripe while in the demo/test mode. Your membership site must be live for the charges to show up in Stripe.
All of our testing thus far has been in test mode. If you noticed, when we tried to signup for these plans, we didn't have to enter in any actual credit card information. We can connect Stripe so we can receive real money from real customers.
First, you will need to set up a free Stripe account. After that, head back over to the Memberstack dashboard.
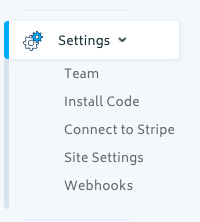
In the main Memberstack dashboard, there is a settings section; click on that to expand it and click on "Connect to Stripe."
On this screen, click the big button to connect to Stripe, you should see a screen like this.
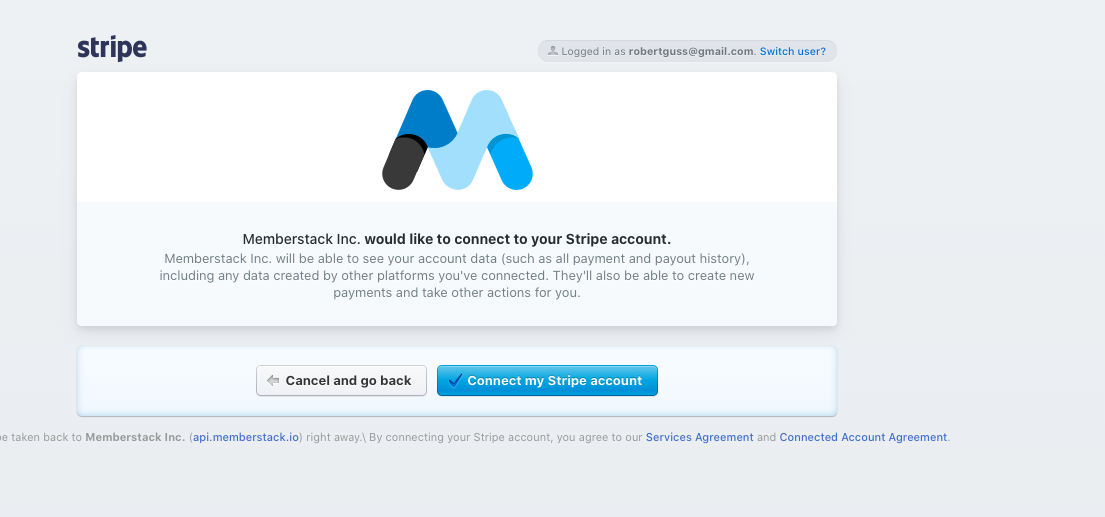
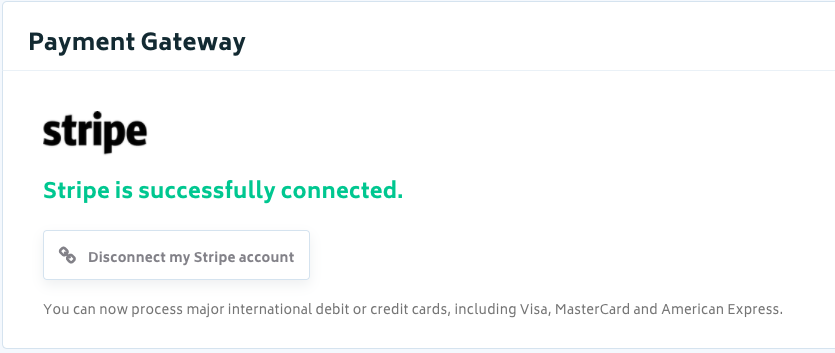
Click the "Connect my Stripe account" button.
You should then be redirected back to Memberstack and see the following:
GitHub Repo
You can find the project repo here inside of Eleventy-Membership/final GitHub Repo
Wrap up
Well, that wraps up this project. To recap, we used Memberstack to create a membership Jamstack site with two membership plans "basic" & "premium." Within Memberstack, we could designate which portion of the site basic and premium members can access and redirect users who do not have the appropriate access. We also learned how to integrate Stripe if we decide to launch a live membership site.
We also gained some experience with the Eleventy static site generator. This SSG is quite popular and is growing ever more so in popularity. It is quite simple to use and has a lot of features built-in by default. It provides several templating languages and other features that make getting Jamstack sites up and running quickly.
For hosting and deployment, we used Surge. Surge is a simple NPM package that allows us to publish static sites with just a single command.